Further to my last post: Making the Trouser Muslin: Part #1... Tracing!, here's how I got on with sewing the pieces together... and a few pics at the end of how it looked and fitted when I tried it on!
I dutifully followed Sunni's instructions for the construction of my toile, and started off by sewing the back darts, followed by attaching the pocket lining pieces to the trousers fronts.
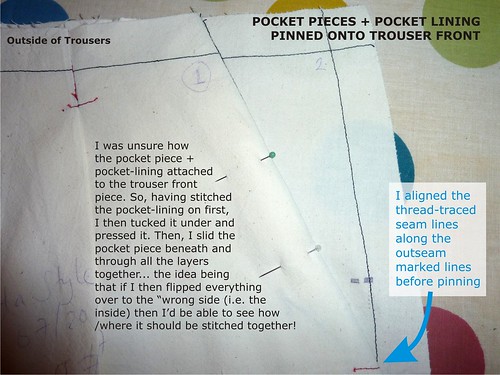
Then, I stitched the pocket pieces to the pocket linings. However, I had a spot of trouble wrapping my head around how this worked (seeing as I'm a beginner and have never sewn a pair of trousers before it's no surprise that some stuff will confound me a little along my sewing journey :)!)... so here's how I helped myself to figure out how the pocket should come together:
Pages
▼
Monday, 31 January 2011
Making the Trouser Muslin: Part #1... Tracing!
Okay, so I'm a little it late with the trouser posts :(! I mean I only sewed the darn muslin (toile) out of medium weight calico on 16th of this month, and 2 weeks later I post about it... my bad!
I must be quite strange - because I quite enjoy all the tracing out onto fresh paper of the Burda Style Magazine patterns, and then transfering them onto the fabric is quite a soothing, calming pastime for me too (I gather most people find these stages tricky and tedious?).
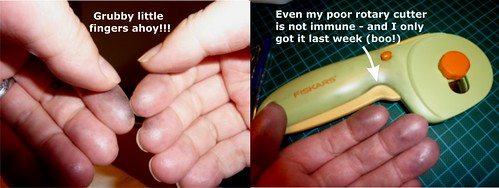
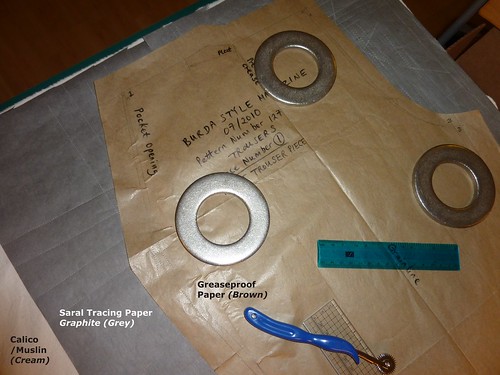
Anywho... I had fun with my pencils, rulers, french curves etc. 'cept I managed to get grubby marks from my Saral Transfer Paper all over my fingers & consequently my brand new 60mm rotary cutter :( I was used the graphite (grey) colour transfer paper which was sandwiched between the pattern ontop and the fabric at the bottom. I lurve this transfer paper - it's the wax free kind that quote:
"A wax free copying paper that can be washed out of fabric and a hot iron will not set the lines. The same sheet can be used over and over again. 12" wide, 12' roll."
Thursday, 27 January 2011
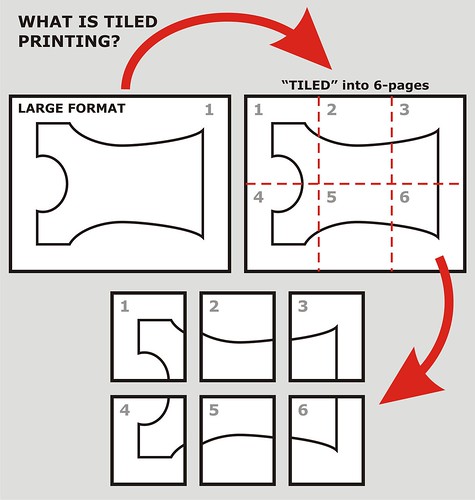
Tormented by Tiling?... Printing PDF Patterns in Standard Paper Sizes
I was reading Tanit-Isis's list of dresses she shouldn't be sewing, and the free download pattern for the Cheongsam by 'Modern Sewing Patterns' caught my eye!
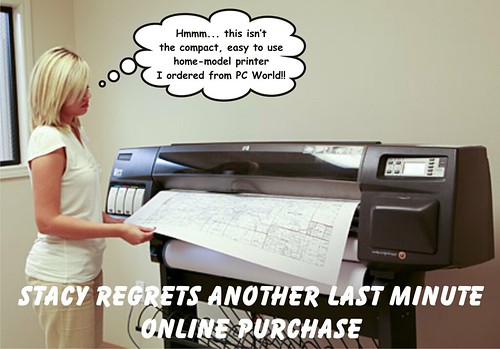
However, as TI points out, it's a huge PDF file designed to be printed at a print-shop on one of those ginormous plotters (gulp!). Whilst the 'Modern Pattern Sewing' site has printing instructions, and they say you can download some software called 'Autodesk Design Review' to fiddle around with the original file to make your own new *tiled version... that sounds like too much faffing around to me (especially as other places on the web give you their free patterns already in tiled-pages ready to print off and sticky-tape them together).
What looks far better to me, is their suggestion to try a free web based service called PDF Tile Printer. I've not used it myself but it looks pretty simple to use, however it only accepts dimension in inches - so if you want to print onto A4 paper (which is what I need as I'm in the UK) then you need to know the size in inches of the paper you want to print out onto.
Sunday, 23 January 2011
Fabric For Me #1: Shopping at Brick Lane, London
Given that I'm making the Burda Style #127 Trousers and Tasia's Pendrell Blouse - I really didn't need any more incentive to add to my ever growing stash buy the fabric required for these lovely garments.
I already have interfacing (the iron-on fusible kind which I've had lousy luck with usually *sigh*), and reading Peter's post it seems that I'm not alone in my fusing-woes LOL! However, I did pick-up a good length of medium weight calico recently - so I might give that a bash as an interfacing layer instead sometime. But, I digress - so I needed some drapey fabric for my ruffle version of the blouse (I still have to fish out the cream lace from the loft this weekend for the sleeveless version), plus I needed some fabric for the trousers. So, one recent Friday lunchtime I popped onto the bus because Brick Lane and a handful of fabric stores are there and only a few minutes away from my workplace.
I already knew of Epra Fabrics from a Google search for fabric stores near to my office, however I forgot that they always shut early for Friday afternoons (doh!). Besides, the last time I visited there (summer 2010) they had a 10 metre minimum purchase in place (probably as they are a wholesaler). That was okay for me at the time 'cos I bought 10m of calico (muslin) haha!
Here's pictures from inside of her store:
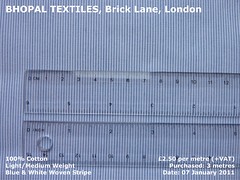
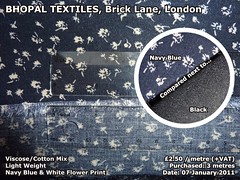
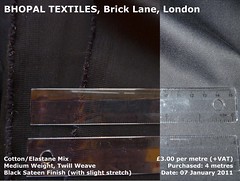
And this is what I bought...
I already have interfacing (the iron-on fusible kind which I've had lousy luck with usually *sigh*), and reading Peter's post it seems that I'm not alone in my fusing-woes LOL! However, I did pick-up a good length of medium weight calico recently - so I might give that a bash as an interfacing layer instead sometime. But, I digress - so I needed some drapey fabric for my ruffle version of the blouse (I still have to fish out the cream lace from the loft this weekend for the sleeveless version), plus I needed some fabric for the trousers. So, one recent Friday lunchtime I popped onto the bus because Brick Lane and a handful of fabric stores are there and only a few minutes away from my workplace.
I already knew of Epra Fabrics from a Google search for fabric stores near to my office, however I forgot that they always shut early for Friday afternoons (doh!). Besides, the last time I visited there (summer 2010) they had a 10 metre minimum purchase in place (probably as they are a wholesaler). That was okay for me at the time 'cos I bought 10m of calico (muslin) haha!
Left - Right: Bhophal Textiles, Epra Fabrics Ltd, and Z Butt Textlies
Anywho... I read about Bhopal Textiles on Melissa's blog and thought I'd give them, along with Z Butt Textiles (another Google find) a whirl. The lovely lady proprietress permitted me to take some photos inside of the store (provided I omitted her visage - which I obliged). Bhopal's is stacked to the rafters with fabric - it's difficult to browse in there, in my experience (x3 visits thus far) you're best to ask her what you want and she'll ferret it out from behind several other rolls :)Here's pictures from inside of her store:
Inside of Bhophal Textiles - Fabric shop on Brick Lane, London
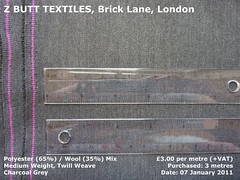
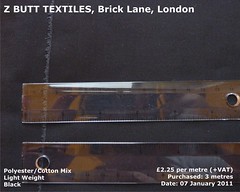
And this is what I bought...
| BHOPAL TEXTILES | Z BUTT TEXTILES |
Inspired by Melissa's Google Map of London fabric shops, (which was in turn inspired by Lindsay T’s map of the NYC garment district) I made one of my own for the above 3 shops:
Ooooh, I've not forgotten to type-up re: how I got on with the muslin/toile for the trousers - however, I have a different plan re: getting them to fit, plus other stuff in general to fit better that I think will work out nicely... and I shall tell all on Tuesday!
View Fabric Shops - Brick Lane in a larger map
Ooooh, I've not forgotten to type-up re: how I got on with the muslin/toile for the trousers - however, I have a different plan re: getting them to fit, plus other stuff in general to fit better that I think will work out nicely... and I shall tell all on Tuesday!
Thursday, 20 January 2011
Dummys, Dummies and Dumber...
Dummys
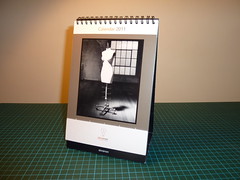
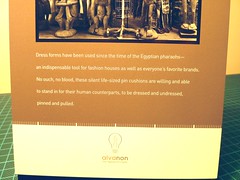
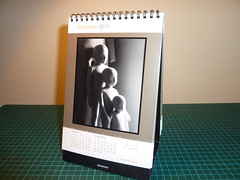
Just after last Christmas (that sounds like ages ago - but it's less than 4 weeks since we had Crimbo 2010!) someone gave me this 2011 calendar because they said they knew I'd like it, and I do! It's by a mannequin supplier called Alvanon here's a couple of pics I took of it - more pics in my Flickr photostream:
Dummies
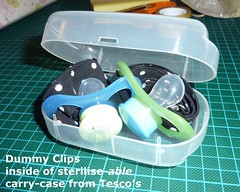
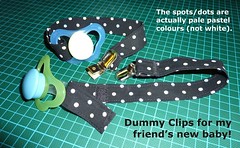
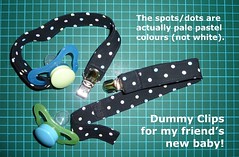
I recently made some detachable dummy clips from my friend V's new baby. I used this tutorial the Pacifier Clip Tutorial (on the Sew, Mama, Sew! Blog - created by Dana from MADE) to make x2 for her. They were really simple to make. I also bought a cheap case from Tesco's to store them in when she's out 'n' about with baby (the box can take the soothers without any straps and be used with a drop of water in the microwave to quickly sterlise them - so I thought it's be handy to have).
Dumber (me!)
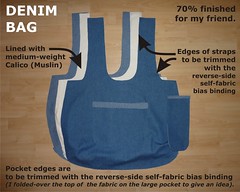
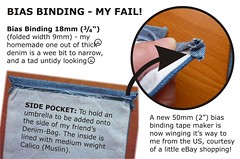
I forgot to check the width of bias binding needed to trim V's new denim bag and it all went a bit wonky. So, I've ordered a new bias binding maker from eBay - therefore her (surprise) bag is not finished yet. But at least she has her pacifier clips - which she loved :) (yay!)
I forgot to check the width of bias binding needed to trim V's new denim bag and it all went a bit wonky. So, I've ordered a new bias binding maker from eBay - therefore her (surprise) bag is not finished yet. But at least she has her pacifier clips - which she loved :) (yay!)
Wednesday, 12 January 2011
Weighing-Up Waistbands Sizes
I tried lin3arossa's idea to measure the flat pattern pieces for the waistband pieces (Burda Style Magazine 07/2010, Pattern #127 Trousers).
I only measured the top edge of the waistband pieces (I didn't of course measure the seam allowances). BTW didn't measure the hip size on the pattern - as I'm not sure exactly where on the main trouser pattern peices the natural hipline is supposed to sit (and it's not marked on it so I cannot tell - plus, being a beginner I'm too daft to make an educated guess LOL!).
| Pattern Stated Size |
Actual Size of Pieces
(As measured by moi!) |
Size 88 • Waist = to fit 82cm (32.3") • Hips = to fit 106cm (41.7") Size *90 • Waist = to fit 86cm (33.9") • Hips = to fit 110cm (43.3") • Waist = to fit 90cm (35.4") • Hips = to fit 114cm (44.9") | Size 88
• Waist = measures 87.8cm (34.6")
2.3" bigger than stated size Size *90 • Waist = measures 91.4cm (35.9") 2" bigger than stated size Size *92 • Waist = measures 96.6cm (38") 2.6" bigger than stated size |
So assuming I know how to handle a ruler ;) and.... even taking into accounting an allowance of up to 2.5cm (1") of ease as part of the waist measurement (i.e. 1" ease would be where the finished garment is 1" larger in size than the actual person's waist measurement) the waistband front and back pattern pieces come up significantly bigger than the body-size that they are stated to fit.
Therefore, knowing what my own body measurements are - I shall be making my muslin for a size 90 waist & a size 88 in the hips.
I am cutting the calico fabric tonight, I'm out of the house Thursday - so sewing it up & resolving fitting issues will be on Friday evening (I am soooo behind & Sunni has already made 3-posts about fitting, including c-r-o-t-c-h adjustments!!)
Most Common Pant Alterations
In which I finally talk about the word.....
Discussing, at length, Crotch Length
*The pattern only goes up to size 88 - I traced onto the end an extra few sizes myself.
Tuesday, 11 January 2011
Making The Grade - How to Score an "A" in Pattern Class
Following on from my foray into pattern-fudging I've gathered together for myself some information on how to go about things the right way.
I'm posting this here - so that if nothing else I can find the links again easily for when I need them next time :)
So, here's to do it the non-fudged way!
Grading Pattern Pieces - Properly! Links to tips/tutorials: |
(1-4 are all on BurdaStyle.com) 1: Grade skirt and pants patterns 2: Grade a bodice pattern to a larger size 3: Make a Pattern Larger or Smaller (by the Selfish Seamstress herself!) 4: Enlarge a basic BurdaStyle pattern (For sewers who just want to enlarge a multi-sized pattern by a couple of sizes without using grading techniques). 5: Making Sense of Pattern Grading (from Threads Magazine’s website) 6: Quick Reference for Cut-and-Spread Pattern Grading (Threads Magazine) 7: Archive for ‘Pattern Grading’ (from The Dressmaker’s Resource, Pattern-Making.com). |
I do own a lovely grading book but I've yet to read it and as a beginner I'm not ready to whisk up a new pattern-size overnight, so this will wait a little while longer to get tested.
P.S. If I find anymore links I shall be sure to add them onto this list :)
Monday, 10 January 2011
Style Inspiration #1: Lace-y Looks for my Pendrell Blouse
Not content with just one sewalong in January, I am also joining Tasia's Pendrell Blouse Sewalong!
I plan on making 2-blouses.
1: The ruffle sleeve version (View B) in a dark-dark navy blue viscose/cotton blend with little white flowers printed on it.
2: A sleeveless version (View C).
I had planned on only making one blouse, however these pictures crossed my path this week and convinced me otherwise (well if I'm gonna make one, why not save myself some time in the long run re: cutting and make two instead hehe). I will make myself a muslin/fitting toile in order to tweak fit as I suspect I shall need a) a full-bust adjustment (FBA) to the pattern, and b) to make the sleeves/ruffles longer (or do I mean deeper/wider - well I know what I mean anywho?).
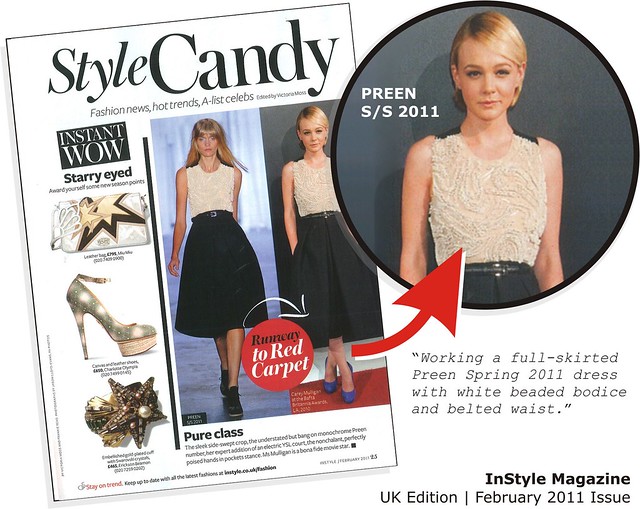
And, in my recent February 2011 issue of InStyle Magazine (UK Edition) I saw this lovely PREEN S/S 2011 dress.
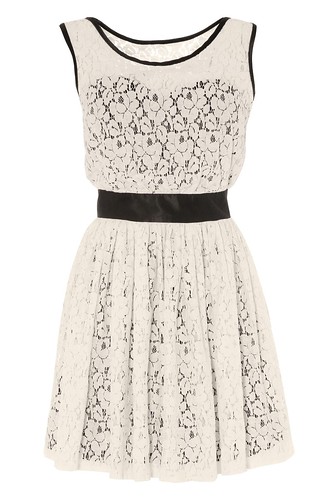
I also, then saw this cream & black lace dress by NEXT (a UK high street store).
I'm loving the contrasting colours - almost monochromatic, however if it were white instead of cream I think it might be far too likely to get dirty for work wear!.
IIRC I have some cream lace hidden in a bag in my *loft, and I have some nice black cotton that I could use to underline my **top.
Oooooh... new thought, new thought! Maybe later on I could make a lace skirt (underlined in black again with a black waistband - as per the Next dress above) to match? A top and skirt would be far more versatile wardrobe wise for me than a dress alone (yay!) I've already made (but not blogged) a blue 'n' white striped seersucker cotton skirt last summer using Gertie's tutorial for "Making a Full gathered Skirt" (Part 1, Part 2) - I will use it again for the skirt :)
There are more pictures from other sew-alongers in the Sewaholic Pattern Flickr Group Pool to enjoy too :)
*Well... when you run out of room in the spare bedroom the fabric stash has gotta go somewhere ;)
**Is it called a top or a blouse when it's sleeveless? I err towards top, a blouse feels more formal (via the addition of sleeves) ergo to my mind sleeveless = top :D!
Saturday, 8 January 2011
An "a-ha" moment!
Subtitle: Or, how I fudged my way around altering the size of the trouser waistband pieces!
Nope, I'm not becoming an *Alan Partridge impersonator, nor am I attending the pop concert of that 80's **Norwegian Pop Band LOL!


Not what I am doing
I was staring at the pattern pieces for my trousers debating to myself about "properly" grading up the size beyond the maximum 88 marked on the pattern - when I noticed (and I'm sure I'm not the first person to spot this) that on multi-size patterns the increasing sizes align next to one another in a uniform sort of pattern (patterns within patterns - who'd of known it?!).
Thursday, 6 January 2011
A (Small) Change of Pants-Plan
Okaaaay then, following on from my last post The Trouble With Trousers and my comment on Sunni's Snipping up your Trouser Muslin post in her sewalong, to which Sunni replied:
"Me: Oopps! I've hit a snag... size wise it turns out I'm bigger than the largest size on pattern #127 (Burda Tall 88 = Regular 44), however I have a plan :) !Sunni: Oh Claire, I'm so sorry! I was shocked myself that I was only 2nd to the last in this size range. Ha. However, I will say that after my first muslin I had to cut down a size because they were quite large all around. Hopefully this is some consolation. You could always grade..... "
So, this (the bit in orange highlighting) got me thinking - has anyone else experienced the same thing (the trouser pattern coming up a bit big in the waist-fit)...? 'Cos if so, then this will save me a whole lotta of a) tracing out of my 2nd choice pattern (#406/407 from Burda Plus Magazine Autumn/Winter 2010), or b) grading the already traced out #127 pattern, and c) wasting my supply of cheapo Greaseproof paper (aka "Sewing Tracing Paper for Claire" - not be be touched by other persons on pain of death... or worse.).
Tuesday, 4 January 2011
The Trouble With Trousers
Oh dear me! I was feeling all smug with myself and super-duper prepared. I really thought that I was ahead of schedule on Sunni's Trouser Sewalong - but not so it seems :( !
On Sunday evening I spent a *happy 2 hours tracing out the pattern #127 from the July 2010 issue of BurdaBurda's Tall sizes 72-88). The size I painstakingly copied was the biggest size this pattern goes up to (NB: the size 88 is same as their regular height women's size 44).
Link: Burda Style - Size Chart (this link is from their German website, the link is to the English translation by Google) the chart [I believe] should apply to Burda Pattern Envelopes, as well as the patterns posted in the magazines.
However, I'd just blithely assumed it would be big enough for me. Having re-measured myself tonight a dawning realisation came upon me... I've *ahem* put on a
Saturday, 1 January 2011
A New Blog, A New Year, and Finally, My First Blog Post!
I’ve been promising myself since June/July of last year (so give or take a good 6 months) that I would finally start posting on my blog. I’d even sorted out a lovely banner image for myself, added in widgets, links to interesting websites I like etc., but still I felt either too shy/ nervous/ apprehensive/ lazy [please delete as you see applicable ;)] to actually post something.
Hence, in the parlance of Peter I remained a S.W.O.B. (Sewists Without Blogs), or as I preferred to term it a SWAUOB or SWABB (sewist with an un-opened blog / sewist with a blank blog) :D!
Following the encouragement of the lovely Tanit-Isis (she of the Lady (Grey) in Red Club) and enthused by the lovely and interesting writings of people like Adey, Casey, Elaine, Gertie, Juebejue, Karen, Karin, Kathleen, Melissa, Miss Celie, Novita, Patty, Peter, Sewiknittoo, Shelley, Sunni, Tasia, Tilly, Zoe (all of which quite frankly make up part of a long and ever growing list of regular and addictive daily reading on my laptop) I have taken the plunge and made my first post.
Hopefully, this will be a place for me to document my personal trials and tribulations of sewing feats 'n' failures, my triumphs and troubles alike. I have my fingers crossed that I shall have the strength of character to feel able to write of the good, the bad and the ugly in equal measure.
Reading through so many of the projects and thoughts of other sewing enthusiasts, it is clear to me that they have felt the benefits of being able to measure their developing skills, and their growing (or occasionally waning!) love affair with their stictched creations. But, always it seems to make for an enjoyable journey and one worth travelling the distance. I hope that the sewing journey brings to me as much joy and positive experiences as I have seen shared openly by others across the web (and across the globe), I'm ready to take things astep stitch at a time. Wish me luck please :) !
Hence, in the parlance of Peter I remained a S.W.O.B. (Sewists Without Blogs), or as I preferred to term it a SWAUOB or SWABB (sewist with an un-opened blog / sewist with a blank blog) :D!
Following the encouragement of the lovely Tanit-Isis (she of the Lady (Grey) in Red Club) and enthused by the lovely and interesting writings of people like Adey, Casey, Elaine, Gertie, Juebejue, Karen, Karin, Kathleen, Melissa, Miss Celie, Novita, Patty, Peter, Sewiknittoo, Shelley, Sunni, Tasia, Tilly, Zoe (all of which quite frankly make up part of a long and ever growing list of regular and addictive daily reading on my laptop) I have taken the plunge and made my first post.
Hopefully, this will be a place for me to document my personal trials and tribulations of sewing feats 'n' failures, my triumphs and troubles alike. I have my fingers crossed that I shall have the strength of character to feel able to write of the good, the bad and the ugly in equal measure.
Reading through so many of the projects and thoughts of other sewing enthusiasts, it is clear to me that they have felt the benefits of being able to measure their developing skills, and their growing (or occasionally waning!) love affair with their stictched creations. But, always it seems to make for an enjoyable journey and one worth travelling the distance. I hope that the sewing journey brings to me as much joy and positive experiences as I have seen shared openly by others across the web (and across the globe), I'm ready to take things a






And, for quick ref.:
A4 = 8.3 x 11.7 inches (297 x 210 mm)
Letter (US) = 8.5 x 11 inches (216 x 279 mm)