Pages

Showing posts with label measuring. Show all posts

Tuesday, 29 January 2013

First Garment Make for 2013! (Part: One - Pattern Drafting & Fabric Cutting)

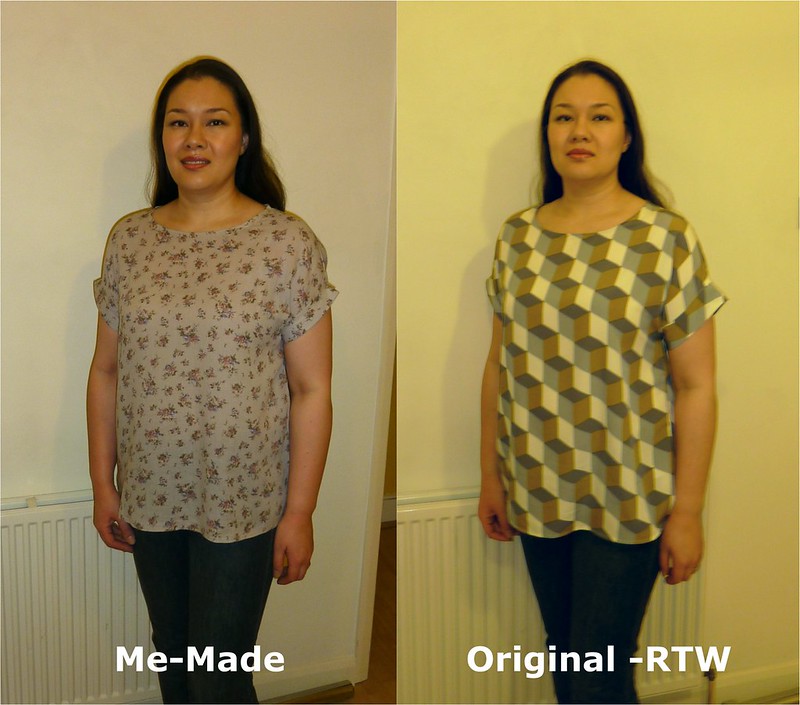
... I decided to ease myself into the New Year with a simple make I'd been planning on for a while. So, here's my rub-off copy of a RTW (ready-to-wear) top I bought last at the end of 2011 for around £23 (I'd fallen in love with the gorgeous geometric print fabric!).

Grey-Floral Crepe Top
Photo on the left taken at 7.30am, the one on the right at 7.30pm same day (hence the tired eyes LOL!)
Below is an image I found on the web of the original top (which shows it's colours better than my meagre efforts above) photo from M&S.

Inspiration: RTW Top from Marks & Spencer

The original top I'd bought from Marks & Spencer's had little cut-on cap sleeves (I'd say like kind of like an extended-shoulder seam, with a very short Kimono style sleeve as described here at the Coletterie) with cute turn-back cuffs sewn on too.

It was very easy to make the pattern - I just employed common sense when tracing the pattern pieces onto paper from the original garment. I didn't even need to consult my 2 books on coping RTW garments Patterns from Finished Clothes: Re-creating the Clothes You Love or Patternmaking for a Perfect Fit.

   
 2 great books on creating patterns from your existing garments

There are only 3 pattern pieces bodice-front, bodice-back, and the sleeve-cuffs... unless you count a moderate length of beigey-coloured 12mm (½") width single-fold bias binding that I used to bind the neckline - which I did following Jen at Grainlines fab tutorial "Getting Flat Bias Necklines" :) (last used to great success on my Spotty Scout Woven Tee top). In fact I only traced out the bodice once - and used it for both the back and front! Why you may ask? Well... the original M&S top is a loose, casual style - with no darts, and virtually no shaping. It's super easy to throw on for work, and in the right fabric can look smart - especially with neat little turn-back cuffs at the end of the short-sleeves. Therefore, front and back pieces are virtually identical - aside from the necklines... wonderful in terms of pattern tracing, and less work for moi LOL!
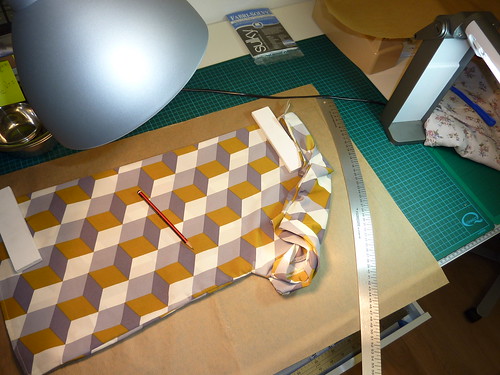
Copying the ready-to-wear top
Copying the RTW top onto parcel-paper
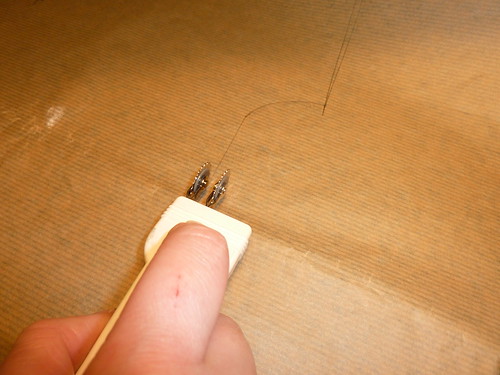
Clover Double Tracing-Wheel
Using my Clover Double Tracing Wheel to add the 1cm seam-allowances

I made the seam-allowances (SA) all 1cm (3/8"), and the hem-allowance 1.5cm (5/8"). The pattern piece for the turn back sleeve-cuffs was very easy. I initially thought that the cuffs might have been shaped, or curved in some way - so I carefully ripped out the 2-3 retaining stitches with my trust seam ripper and had a look. They were just rectangles - yay! So, the pattern pieces are just 11cm x 42cm (4 5/16" x 16½").
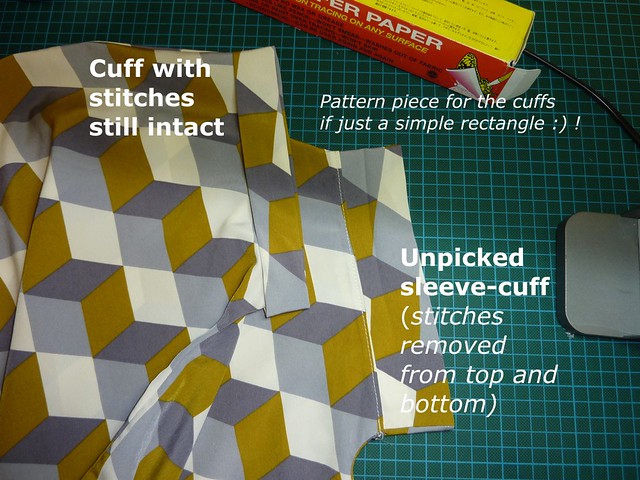
Checking out the turn-up sleeve cuffs


  TIP: I Found this handy site for converting between cms & inches 
  - it shows the imperial measurements in fractions ;)! You can still do it the old fashioned way:
 
  X cm ÷ 2.54 = Y inches, 
  E.g. 10cm ÷ 2.54 = 3.93 inches (or the website says = 3 15/16") 

  or A inches x 2.54 = B cm 
  E.g  11 13/16" x 2.54 = 30.00375cm (i.e. the length of a standard classroom  ruler ;)!)

  (With 1mm = 0.1cm, 10mm = 1cm - in case you're playing around in millimetres too.)


Next, to decide which fabric to use. The original is 100% polyester - but in an almost silk-like drapey finish which I wanted to recreate as much as possible.  Having seen Winnie's recent make I remembered that I had the same fabric already in my stash + extra bonus, it was already pre-washed :) (Winnie got her fabric in a swap with Jane - we both bought the same fabric for only £2 / metre at this lovely meet-up back in April 2012).

So, the soft lovely lightweight grey floral fabric it was then! (I don't know the fibre content but it's possibly got some viscose or cotton in in - as it doesn't feel artifical/polyester-ey or acrylic in anyway.)

Cutting out was interesting as the printed fabric was a bit poorly printing along one of the selvedges - but it was easy to avoid.
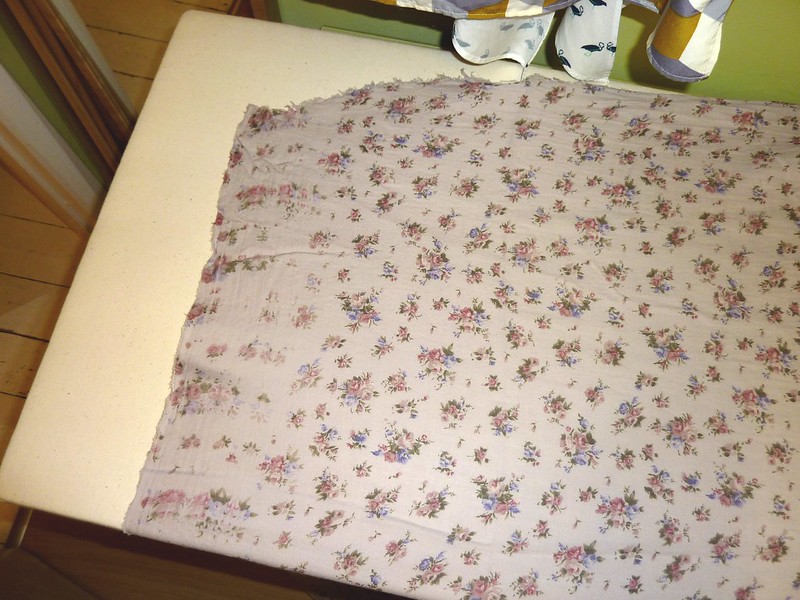
Badly printed Grey-floral crepe fabric
Can you see the dodgy-area of poorly printed fabric down the left-hand side ?

And, I've drawn a conclusion about my fabric cutting-style "I do not like cutting on the fold!". I find it fiddly to line everything up neatly, and I feel I can save fabric more if I use a single layer. So, for this make, and going forward I'm going to make sure and pattern pieces I use that say cut on the fold - that I trace out and tape on their matching mirrored missing side.

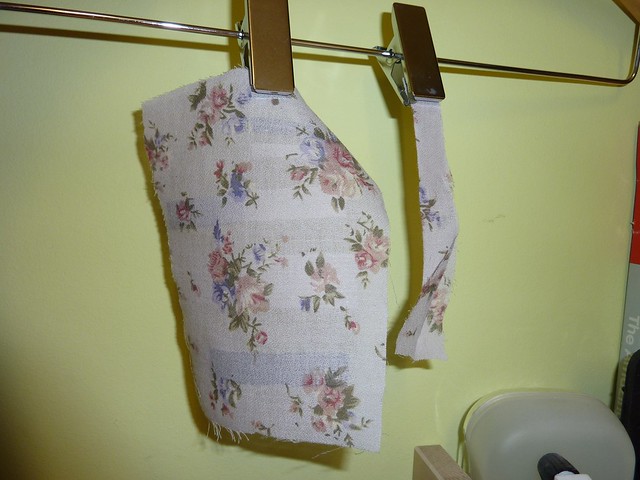
Due to the lightweight nature of the fabric I knew that I'd need to stabilise the neckline, shoulder-seams (front + back - as I was concerned about tearing), thicken-up the sleeve-cuffs (so they don't flop down and get all narrow/wrinkled and unsightly looking) and possibly beef-up the 2 simple little side-vents a bit too.

So, I did some test samples with various fuseable, iron-on stay tapes in my stash (utilising my trusty iron + point-presser clapper to ensure good results) to check for: 
a) durability (I didn't want them to bubble, or warp, or come off as soon as I glanced in their direction LOL!)
b) colour match (NB: the fashion fabric is light weight - so there's the possibility of show-through from underneath)
c) weight (as I want added strength, but not stiffness!)

Fusible Knit Stay Tape (Narrow Interfacing Strips)
The different knit fusible stay tapes
Fused samples of knit stay tape on lightweight grey-floral crepe fabric
Fused fabric sample
I tested some Extremely Fine Fusible Knit Stay Tape from Sunni's store in both Ivory and Black. It fused very well in both colours, and had a great flexibility still to it - which I had expected, with it being a knit-tape. I also tried a Prym Tape from John Lewis (called 'Edge Tape Interfacing' in 10mm, White). All the stay tapes performed very well... so it was just down to colour! Due to the semi-opaque nature of the fabric I was worried about show-through from the stay-tapes. So, I held them up to the light to judge on the best one - I even tried cutting them in half-strips to make them narrower and less visible. I also tried layering tapes onto of each other ivory first then black, and vice-a-versa... I guess I was hoping it'd sort of turn grey together when viewed from the front, and I was willing to give it a go if it didn't turn out too stiff LOL!

The best in the end was the Ivory tape from Sunni. I cut it into narrow half-width strips; all the better to reduce it's visibility from the outside. Due to the flexible-nature of the knit it was very easy to apply around curves, without any need for clipping - yay!

As I now prefer to do it this way; I do not cut out the neckline from the rest of the fabric until I really have too. I feel it is easier to handle, and far less likely to warp and stretch out of shape this way (especially on this delicate lightweight crepe fabric). To my mind, it saves me a headache and what little fabric I would of saved had I gone ahead and cut it out the "usual" way I can live without ;) LOL!

So, I fused along the stitching line - saving the cutting out of the neckline for later (until after I've sewn the first stage of applying the bias-binding facing to the outside of the neckline - which is just before turning it to the inside and stitching it down again).

Next up... Part Two - Overlocking and Vents


Wednesday, 21 December 2011

Going Round The Bend...


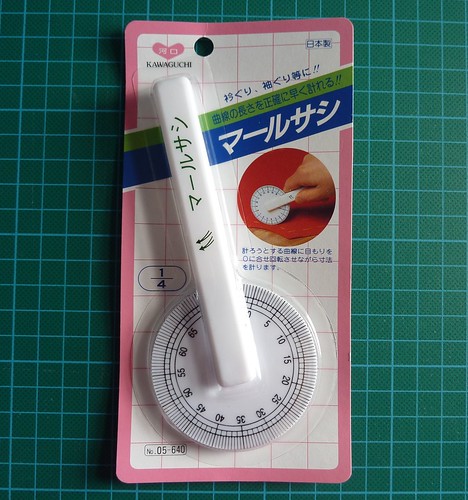
Measuring Wheel - Kawaguchi Packet

Nope - I don't mean I'm going mad (although, what with it being Christmas it is turning into silly season trying to get all the festive chores completed in time for family trips etc. hohoho!).


I mean measuring round bends and curves! Following on from my last post about rulers that don't measure up I thought I'd mention where I bought my lovely measuring wheel from :)


I first encountered this particular product when Yoshimi held a giveaway (at the end of 2010 / beginning of January 2011 - I'm not sure of the exact date as the blog post is no longer there LOL), and I became a little obsessed with getting my hands on this lovely Japanese sewing gadget! (The lovely Melissa won that giveaway and her happy reports of using it only made my desire to purchase this notion even greater.) So I finally succumbed, and bought it this summer.

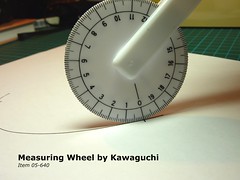
Basically, this small white plastic wheel has markings all around it's circumference from 0 - 20 cm, with fractional increments at every mm too. It's a revolving, rotary measuring tool that allows you to easily (and in my opinion) pretty accurately measure around curves 'n' bends - so perfect when you need to check the size of armholes (armscyes) and necklines etc. A great addition to my ever growing arsenal of pattern cutting tools!

Measuring Wheel (20cm Side)

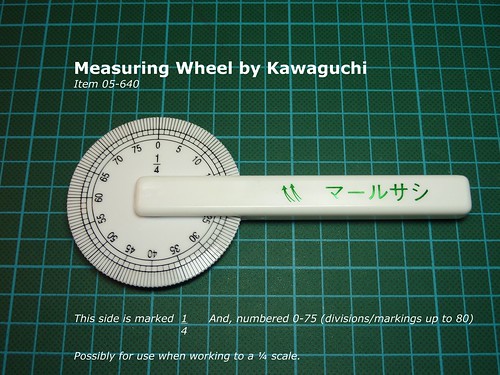
One one side it's labelled 1   and is labelled 0-75 for 80 actual divisions, but I don't use that 
                                  4  side (I think it's to do with ¼ scale-drawings perhaps? Dunno!).

Measuring Wheel (Scaled Side)

It works in the same way that a 'trundle wheel', or a 'surveyor's measuring wheel' - which are used to measure distance (you might of seen your local council workers using them on the roads, and pavements of your home town sometime).

To use it...
You simply line up the 0-mark of the wheel carefully against the start of where you want to measure from.
Then, you roll or turn the wheel forwards and away from you.
Stop, at the point/end you decide - and make a note of the number on the wheel touching the end-point.
NB: If you are measuring a line longer than 20cm (which is the length of 1 full rotation of the wheel, i.e. it's circumference is 20cm), then just keep a note of how many times the 0-mark whizzes past. If it goes past 3-times, and the end-point of your curved line finishes on say 5.3cm against the marks on the measuring wheel, then the distance is:

(3 x 20cm) + 5.3cm = 65.3cm... s'easy!


Where to buy...
I got mine from a Japanese shopping site called Rakuten (apparently they are Japan's largest online retail marketplace) - it's a bit like Amazon marketplace, with lots of different stores selling stuff through them! Luckily, there is an English language version of their site (all my links below are in English - except where stated).

Manufactured by Kawaguchi
Manufacturer's Item 05-640  (商品番号 = Item 05-640)
Japanense name for the item is: マールサシ (Google translates this as 'Marusashi').
Seller / Store Name: Sanoya (あっと クラフト)
Link to Sanoya's Item/Product Page: Product Page
Price: *JPY 770 (*price I paid exc. Tax, and exc. Shipping)
Tax:  I bought 2 of the measuring wheels (so I have a spare one in case one broke - I thought it'd save me shipping/time in the long run) and my Tax for the 2x was JPY 76
Shipping Costs: JPY 180 (which was for 2 wheels) to the UK.
NB: To search for other stores selling this same item cut and paste マールサシ into the search box (or click here which gives you 2-stores). For more sellers in Japanese language only click here (for the Google translation here).

So, in total I paid for 2 wheels JPY 1,796 (approx. £15.00 GBP).
By my rough calculations, if you only wanted x1 wheel you'd be looking at (worse case scenario) around £9.00 GBP no more.

I use the XE Personal Currency Assistant to work out how much approximately items purchased from overseas will cost me.

But, you can ask questions of the sellers via the Rakuten site to check what your total costs might be, and here's their page on Delivery and Shipping Rates.

Rakuten also have sites aimed at other shopper's home countries wishing to buy from them in Japan: USA, Canada, United Kingdom, Australia, New Zealand, Singapore and France.

- - - - - - - - - - - - - - - - - - - - - - - - - - - - - - - - - - - - - - - - - - - - - - - - - - - - -
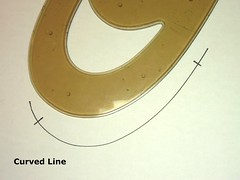
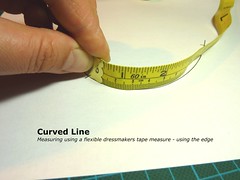
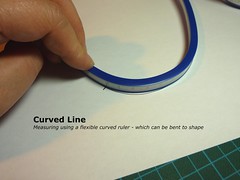
I decided to compare my lovely measuring wheel with 2 other methods I'd used in the past - dressmakers tape measure (on it's edge), and a flexible curved ruler. I drew a curved line onto some paper marked start and end points. The wheel gave me 12.25cm, the yellow tape measure 12.4cm, and the flexible ruler 12.15cm. Pics below:

Curved line on paper Measuring using flexible tape measure

Measuring using a flexible curved ruler Using the measuring wheel
- - - - - - - - - - - - - - - - - - - - - - - - - - - - - - - - - - - - - - - - - - - - - - - - - - - - - 
Alternative Wheels?...
I originally tried to find something similar to this tool in the UK (as I thought international shipping would cost too much).

Morplan sell a Curve Measurer (Product Code: 43895, £13.95 GBP + VAT and Delivery).
Image Source: Morplan.com

And, there are also 'Map Measures' (sometimes called Planimeters - although that can mean a very different type of measuring tool too) used to measure in scale distances shown in miles, kilometres and nautical miles - so I would've had to fiddle around with maths, and would've mucked it up no end I expect!


Image Source: Amazon.co.uk (shown is a Gelert model)

Or, there's even a pricey model by Alvin (Alvin 1111 2-Face Map Measure, Curve Measure, Plan Measure).

Frankly, they look way more complicated than the lovely simple Japanese tool - don't they ?


Thursday, 8 December 2011

When Something Doesn't Quite Measure Up...

Self adhesive measuring tape
"A silvery, slithery, snake in the grass
perhaps? Or simply an inaccurate
peddler of measurements? Hmmmm..."

I'm still midst organising the new sewing room - and have been much distracted by a) a lack of lighting downstairs in our house due to an electrical fault (which is not good in the dark winter evenings, and it has taken up too much of our time on the weekends trying to fix it without paying £££ for an electrician to come out - luckily we managed to isolate the faulty part of the circuit and everything else apart from the kitchen now works again), b) trying to assemble a new garden shed + paint + felt it's roof + insulate it etc. etc., c) life in general and d) I transferred to a new job last week too ... phew! You get the picture - sewing has been on my mind, but not being actioned at all and my fingers are gettin' twitchy!

So, I decided to instigate a little drop of progress when I bought a self-adhesive measuring tape (approx. 150cm / 59" long) from MacCulloch & Wallis after work one day, for the princely sum of £1.95 (+ VAT). It's a silver coloured tape (polyester based I believe - it certainly feels very thin and not at all metallic despite it's appearance). I decided it would be very handy on the front edge of my cutting table (which is 150cm long from IKEA).

I cleaned off the surface for dust and grease (I swiped it with a dab of surgical spirit on a J-cloth to de-grease it and allowed it to evaporate off first to ensure good adhesion). I carefully applied the tape smoothing out bubbles as I went, and I took extra care not to apply to much stretch/tension on the end, so as not to elongate and distort it as I reached the end.
So, imagine my surprise when I saw this

150cm self adhesive measuring tape
What's not right with this picture? 150cm long table + 150cm tape measure... Answers on a postcard LOL!

Hmmm... see how on my 150cm long IKEA table (I checked!) the self-adhesive measuring tape seems to have stretched during the sticking down process and is too long by approx. 4mm?...

I considered lifting and reapplying it - but I thought it'd definitely not go down again so cleanly and would end up a nasty waste of time. So, I thought I'd check it against my fibre-glass based sewing tape measure (yellow). But, according to the yellow thing my table was 6-7mm longer than 150cm  - WHAT!?*!

Okay, by now I realised that one or both of the tape measures was inaccurate - so I compared them to some rigid rulers...

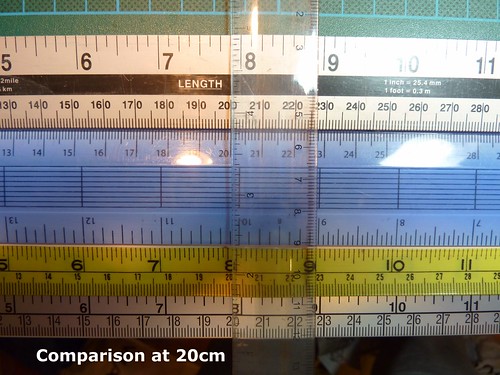
Comparing to my tape measure (at 20cm)

I comparing the (silver, at bottom of photo) self-adhesive measuring tape which I suspect is not accurate to the flexible tape-measure (yellow) and a rigid plastic ruler (45cm), and an aluminium metal ruler from the DIY store (100cm).

Attempting to line them up at the 20cm mark they are all pretty close - only the yellow one appears to be 1mm longer than the rest.

Next, I thought okay if the yellow 'n' silver ones ARE out of whack, then maybe it'll show up more at a greater distance (e.g. let's say the silver one was 1% too long - 1% of 10cm would be only 1mm, but at 100cm that's 1cm more - and easier to spot too).

Comparing to my tape measure (at the 100cm)

Comparing the tapes and ruler at the end of the 100cm aluminium ruler - the vertical clear ruler is aligned with the 100cm mark on the yellow tape-measure, but see how the yellow one seems a bit "short", and the self-adhesive tape (bottom) seems a tiny bit "too long" verses the aluminium ruler!!

Lastly, looking at the end of the table top...

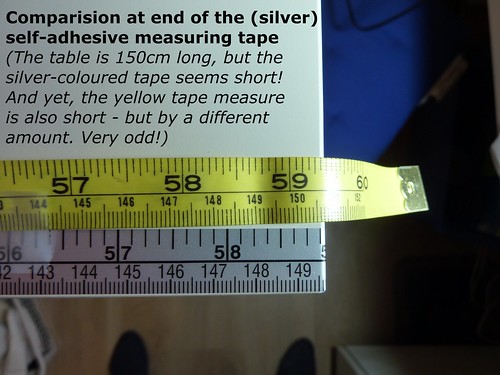
Comparing to my tape measure (at the end)

Comparison at end of the (silver) self-adhesive measuring tape. The table is 150cm long, but the silver-coloured tape seems short! And yet, the yellow tape measure is also short - but by a different amount. Very odd! (NB: I carefully smoothed out the yellow one and held it in place lightly with sticky tape to get the photo.)

I have concluded that the self-adhesive tape and my yellow tape are inaccurate, and not to be relied upon for very detailed work - especially not anything over 20cm (haha). This got me a bit worried about some other rulers I have - but I checked those against one another and they seem fine (phew!).

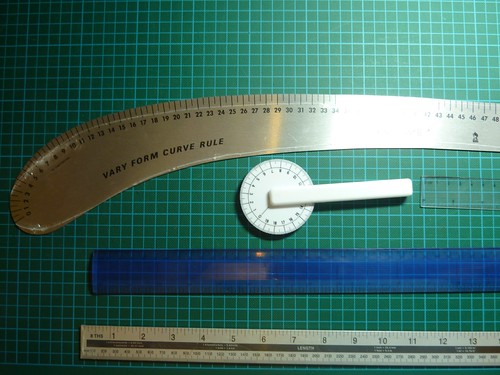
Various rulers
A few of my rulers (I DO have more haha!)

I have heard that older fabric based tailors/dressmakers rulers were very prone to stretching and distorting - but that's not such a problem for the modern sewing tape measure (often made from fibreglass enclosed in plastic - like my yellow ones pictured many times above). So, my yellow ones shouldn't get any worse LOL!

I think the moral of this story is that a bad workman can't blame their tools if he/she doesn't check them first. Accuracy in sewing and pattern making is very important, and inaccurate rulers etc. could throw you off course without you even knowing. Imagine if you accidentally added 3mm to the edge of each seam allowance line on a 2-piece, A-line skirt zipped-up the centre-back - that could mean 4x side seam edges, plus (2x) either side of the zipper - 6x edges in total. 6 x 3mm = 18mm or approx. ¾" (that's assuming you didn't stitch it inaccurately too - which could compound the error eeek!). That's a big difference between a well fitting waistband or not!

Luckily for me, I don't plan to use the tape stuck on the table for accurate work. It's there to help me measure up approximate lengths of fabric / pattern paper / trims etc. and will save me time rummaging around for a tape measure when I need one :)