Pages

Showing posts with label overlocker. Show all posts

Friday, 11 December 2015

Delta OL-1000 Overlocker: PDF Instruction Manual for Download.... "Paying it Forward!"


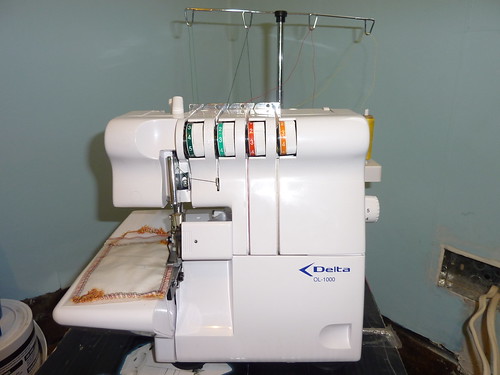
04 Overlocker - Front
My old 'Delta OL-1000 Overlocker' (Serger)
(More pics here)

Sometimes you just gotta read the manual right ;-)? I was browsing the web (as you do!) and I thought I'd look up my first Overlocker (Serger) model that I bought 2nd hand way back in October 2010. These days I'm totally loving the Brother 1034D that my lovely Hubby bought for me a birthday pressie coming up to 4 years ago - but I was curious to see if many people had my old machine.

My old machine is a Delta OL-1000 Overlocker, and my first taste of using it was at a class that I attended back in 2011 with Karen. I never got to use it too much at the time, and sadly I never got the hang of adjusting the tension to adeptly (I suspect I may be better at that now that I've made upteen T-Shirts on my Brother machine haha!). Less than a year after the class I got my 1034D and it's been happy overlocking all the way ever since :-) yay!

My browsing around brought up a few links where people had picked it up as a second-hand buy, or... where someone was desperate to get a hold of a copy of the instruction manual as their pre-loved machines were missing the user guide.

Well now - this struck a chord with me. And, being the helpful soul that I would like to think that I am, I decided to scan my own copy of the manual and to upload it to the world-wide-web for all and sundry to find. (I.e. my way of paying it forward!)


So, if you've come across my blog whilst searching for a copy of the guide book then your in luck folks! Here are 2 different places where I have uploaded the PDF file (it's around 17MB). I hope that it helps anybody who has been struggling to find a copy to print off. (NB: The pages are sized to A4 - so adjust your printer settings as you feel necessary peops!)

Download a PDF copy of the Instruction Manual for the Delta OL-1000 Overlocker Sewing Machine here:

Issu: http://issuu.com/clairesew-incidentally/docs/delta_ol-1000_overlocker_sewing_mac

Google Drive: https://drive.google.com/file/d/0B2Wg8u0BpVn-aGNVQ1JPb1lzcDQ/view?usp=sharing


Here's an embedded preview from Issu.com:


Enjoy!!!


Monday, 12 May 2014

"Oil Be Back!"

Alternative Post-Title: "Just a Drop Or 2 Please!"


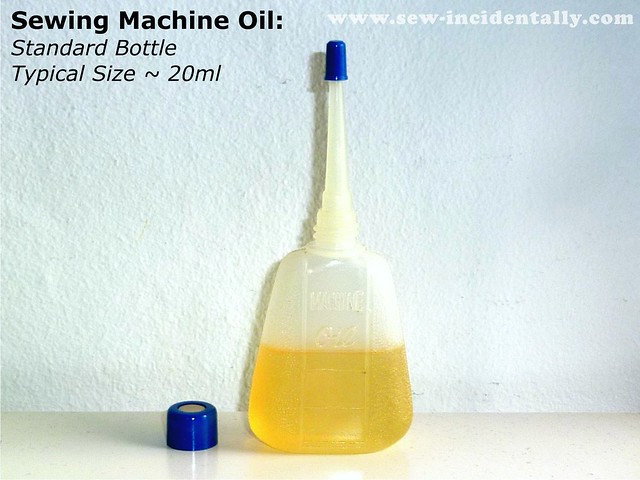
01 - Sewing Machine Oil - Standard, Small Size Bottle (20ml)

I gave *2 of my sewing machines a good clean, de-linting and oil-up a couple of weeks ago. (*Yeeeeessss I own even more...hehe!)


The recipients of the spring-clean were my beloved vintage, all-metal, super heavy (it weighs 19.8kgs / 43.7lbsNovum New Mark IX - Sewing Machine and my Brother 1034D Overlocker (serger).


Brother 1034D Overlocker (Serger)
Using my mini-vacuum attachments to suck out all the
nasty bits from the insides of the overlocker. 
I posted the photos shown above of my machines mid-clean onto Twitter and Instagram and @ali_goddard asked me on Twitter which oil did I use? So, I decided to share a few of my thoughts on the topic of purchasing sewing machine oil.

If you pop into your local sewing, fabric, quilting or craft store you'll likely encounter one of these small plastic bottles of sewing machine oil (see below). In my experience these are the typical offering in the shops and online stores here in the UK.


Left:  Prym Sewing Machine Oil (Image Source: John Lewis)
Right:  Hemline Sewing Machine Oil (Image Source: Popular Patchwork)

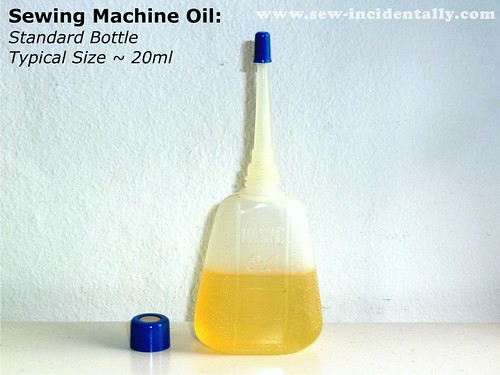
Here are some photos of just such an "average" bottle of oil that I have at home.

Sewing Machine Oil: Standard Bottle 
Typical Size ~ 20ml


01 - Sewing Machine Oil - Standard, Small Size Bottle (20ml)

02 - Sewing Machine Oil - Standard, Small Size Bottle (20ml)
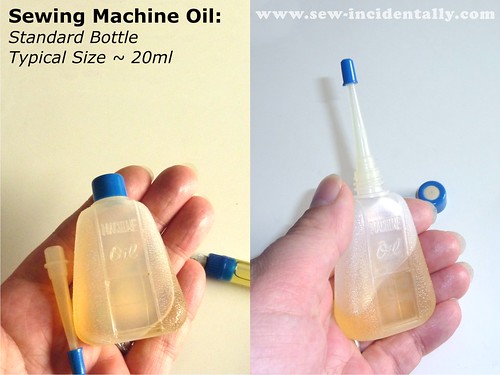
Typical, standard sized sewing machine oil bottle.
The lid unscrews, and you then screw on the long spout/tip
with which to dispense your oil carefully!
Now, if like me you have a vintage sewing machine - then [hopefully] you've read the instruction book and might have noticed that it asks you to oil your machine regularly... my book requests a weekly oiling! I'm guessing that back then, the manufacturers thought a whole lotta sewing was happening each and everyday LOL! Anyway, if you were to oil your vintage sewing machine even on a monthly basis - it's clear to see that you'd soon eat your way through a fair old amount of oil....

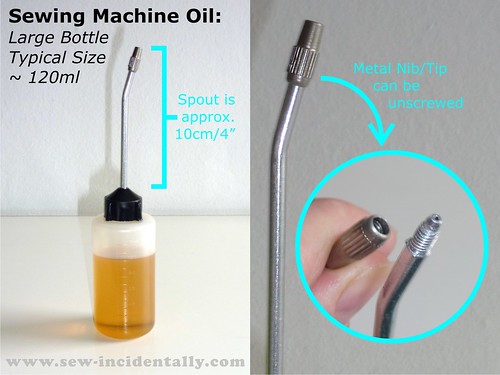
...hence why I purchased myself a large, more economical supply. Below, are pics of my Large Bottle: Typical Size ~ 120ml

03 - Sewing Machine Oil - Large Bottle (120ml)

This larger bottle holds 6-times the contents of the smaller, 20ml standard-sized bottles. The metal spout is approx. 10cm/4" tall, and the metal nib can be unscrewed (although I'm not sure of the purpose for that hehe!)

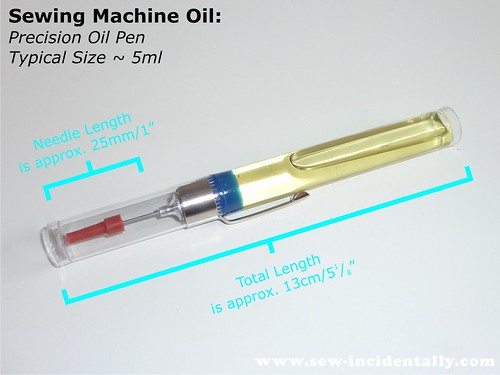
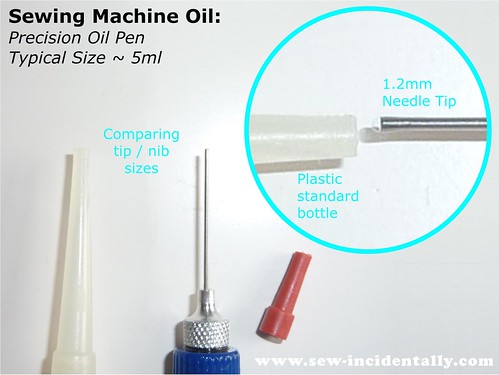
More recently, I purchased for myself a much smaller bottle... in fact it's a Precision Oil Pen, with typical contents of 5ml of oil.


04 - Sewing Machine Oil - Precision Pen (5ml)

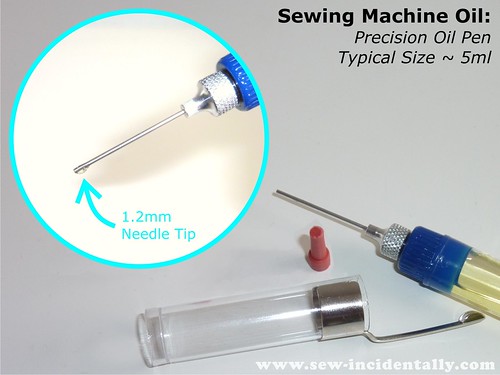
05 - Sewing Machine Oil - Precision Pen (5ml)


Needle Length is approx. 25mm/1”.
Total Length is approx. 13cm/51/8”.
1.2mm Diameter Needle Tip.
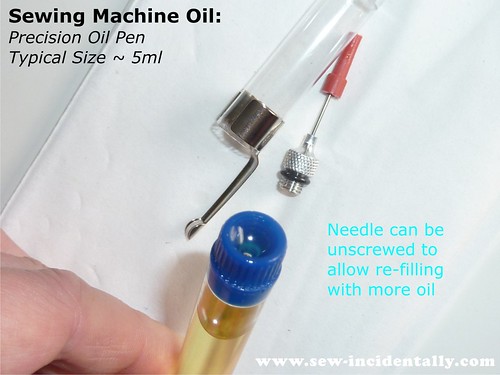
Needle can be unscrewed to allow re-filling with more oil.

06 - Sewing Machine Oil - Precision Pen (5ml)

The tiny 1.2mm sized tip is what drew me to purchasing the Precision Oil Pen. I had previously been guilty of over-oiling my machine with the standard/large sized bottles (not a good thing as excess oil can attract dust/lint and eventually gunk up your machine, so impeding performance). The tiny tip can dispense very small/fine droplets of oil to precisely where it's actually needed
. This style of oil dispenser is often sold for watch repairers - who work on very small sized machinery and mechanics indeed!

Here's a photo comparison of tip / nib sizes:

07 - Sewing Machine Oil - Precision Pen vs Standard Size Bottle

The Precision Oil Pen tip is approximately x3 times smaller in diameter than the standard/typical 20ml sized "small" sewing machine oil bottle.

Check your sewing machine manual! In regards to [non-vintage] newer machines it's vital to check your user manual / instruction book to find out whether your manufacturer recommends oiling before use. It may seem odd to us non-sewing engineers but many, many modern machines do not require oiling. It seems intuitive that any moving parts where metal moves against, or on another metal part should be oiled, however for new modern machines this is not always the case. Your sewing machine dealer or manufacturer should be able to advise you whether your particular model can or cannot be oiled - and if so, which parts are safe to be oiled (without causing damage to your precious!).

Here's a little table I drew up summarizing my thoughts on these 3 different sizes of bottles:


Shopping... some places to try:
Big Bottles (search for 120ml /150ml size, 'Singer' bottles are often larger too): eBay is great - try
 AlanSews (AlansAlterations)


Precision Oil Pen: eBay again! ClockStoppers seller has some

Standard/Small Bottles: Save on P&P delivery fees and hunt around at your favourite local quilting / sewing / craft shops for Hemline, Prym brand bottles. John Lewis also stock this size of oil too.


Friday, 26 April 2013

Gimme An "F"... For (Fabric) Face!!


Okay, so I have a day-off of work and I'm at home by myself - and I think "I know I'll throw some fabric in the washing machine to pre-wash it whilst I remember and I have the time." And, I don't know about you guys, but if I have the chance I much prefer that all my fabrics are washed, dried (I air-dry naturally folks = as there's no room for a tumble-drier in my house LOL!) and pressed before I decide to start a project. I find it rather off-putting when the passion and impulse to start something new turns into a damp squib because I haven't pre-washed my fabric yet :(  


Washing = 1 or 2 hours + Drying = another couple of hours + Pressing = Time wasted twiddling my thumbs.

So, now whenever I remember I wash new pieces of fabric as they join my stash + if there are some other similarly coloured as yet unwashed pieces they get thrown in to the machine too.

And that's just what I've done today.

But, before I wash 'em I have now adopted the following as best-practice for me...


    TIPS when you PRE-WASH YOUR FABRIC

    Overlock (Serge) Cut-Ends = prevents fraying, and reduces loose threads from clogging up
    your washing machine's waste pipe.

    Mark the Fabric “Face” - Any paper labels would dissolve in the wash - so,
    an embroidered “F” will identify the correct side (face) of your fabric.

.

TIP - Pre-washing fabric, overlock and mark the face
If you like this tip you can Pin-It here on Pinterest :) !

I was finding that I was constantly unclogging the waste-water drainage pipe on my washing machine on the next "normal" wash-load after I'd washed some fabric. And, each time the debris I removed was made-up of threads that I was tediously pulling out with some fiddly tweezers. All those threads were the same colour as the fabric I'd just washed... and it didn't take Sherlock Holmes to figure out the source LOL! Hence, now I overlock the cut-edges (no need on the selvedges of course!) before washing the fabric.


Different sides... And, it doesn't apply to all fabrics - as 99.99999% in my own stash have easily discernible face (front) from back/reverse sides - printed fabrics being an obvious example. However, some fabrics are soooo hard to tell - and if you were to accidentally mis-match pattern pieces it could affect the look of the garment as even a subtle difference in the reflected-light/colour/nap between 2 adjacent pieces could make a finished garment look "off". This happened today - I had a couple of pieces to wash that came to me with some handy green paper labels saying "FACE" stapled to the correct side of the fabric. Now, clearly paper is going to dissolve and fall off with the water in the washing machine. So, I quickly stitched a letter "F" into the selvedge on each piece = all sorted!


Wednesday, 13 February 2013

First Garment Make for 2013! (Part: Two - Overlocking and Vents/Side-Splits)


Picture heavy post coming below peops... if nothing else - it serves as an excellent visual reminder for me - as I need to make-up the plain black cotton version of this top... as I've already cut out the fabric LOL!

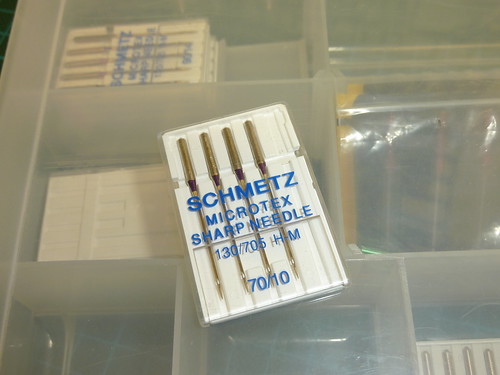
Following on from my last post I ran some test samples on my sewing machine - as I was concerned that it might chew up the lightweight flimsy fabric. I used a Microtex needle (so it's nice and sharp!) - and my vintage machine has the ability to lower the feed-dogs for Normal - Silk - Embroidery fabric. The last setting basically lowers the feed-dogs completely out of the way so the fabric can be moved around freely at will. SIDE-NOTE: That's a pretty handy feature if you're using a Buttonholer attachment, as it can save the need for an extra plate to cover any feed-dogs that cannot be lowered out of the way. With a Buttonholer the attachment itself grasps onto the fabric and moves it around as the buttonhole is stitched - therefore it needs the fabric to not move along with the sewing machine's feed-dogs.


Schmetz Microtex Sharp 70/10 Needles  Switch to raise/lower feed-dogs on my sewing machine

The straight stitch samples came out best on a fairly long stitch length, with the top-thread tension reduced a little, and the feed-dogs lowered to the Silk setting. I also preferred the nicer stitch formation I got using my straight-stitch foot and straight-stitch needle-plate (the plate was another excellent purchase a while back from the ever-handy Helen). I find that with that plate I can only use the machine with the needle-positioned to the far left - otherwise the needle would break when it misses the tiny narrow hole... ask me how I know !!?!.

I also tested the overlocker (serger) using 4 large spools of nicely matching grey thread I picked up IIRC at William Gee in Dalston. I had tried the tie-on method of switching over the threads... but only the left-needle worked! All the others got jammed and caused the thread to break. Anyhow... it's so easy to thread my machine I don't need the instructions anymore - just a pair of tweezers and some good lighting LOL!
  
Then, having examined the construction of the original (i.e. nosing around inside!) I could see that the majority of seams were overlocked together. I also observed, that to create the small, but simple side-vents (splits?) I'd have to overlock the front and back side-seams on both the front and back bodices from the hem-upwards for about 11cm (4½") - that's the length of the vent + extra at the very bottom for the turn-up of the hem-allowance + a bit extra above where the top of the vent ends. The idea would be to then straight-stitch the side-seams (SS) and the integral but short underarm seams together - stopping at the point where the top of the vent should be. The overlocked edges of the vent are then pressed to the inside of the garment along the same width as the 1cm (3/8") SS - and then they are topstitched in place about 7mm (¼") from the edge. After that the hems can be overlocked, pressed and then straight-stitched into place.


So, to pre-overlock the vent/side-split edges I did the following:
(1) Marked the where the top of the vent is (the same place the side-seam ends/where the split-opening finishes).
(2) Marked the level at which the SS will end-up overlocked together - then clipped from the edge of fabric inwards at this level stopping at the point where the finished fabric edge will finally be (NB: for this delicate lightweight crepe fabric I cut the pattern pieces wider than the final).
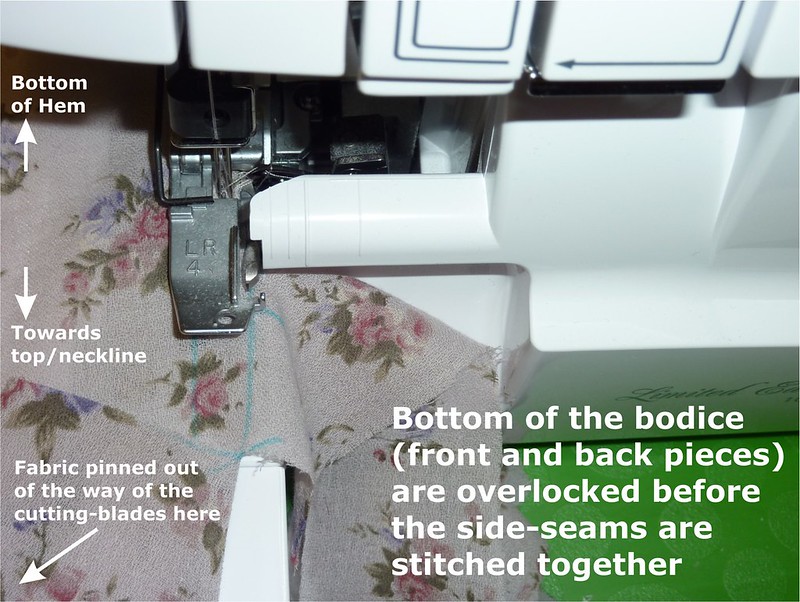
(3) I then folded the fabric above the clip in towards the middle of the bodice, and pinned it out of the way. (It will be out of the way of the overlocker blades.)
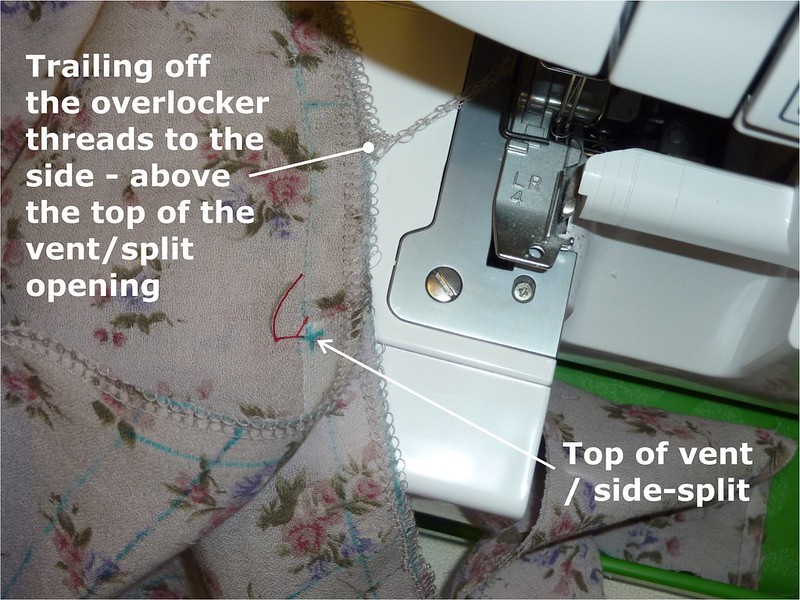
(4) Then each of the 4 vent/side-split edges are overlocked (4 = 2 sides on the Front Bodice, 2 on the Back Bodice) - tailing off the threads at the point where the upper fabric of the bodice is folded out of the way.

 Overlocking the seam allowances on the vents (side-split opening) first

Overlocking the vents - pinning fabric out of the way of the blades

Overlocking the vents - finishing at the top of the vent

I was then ready to straight-stitch the shoulders together - but this fabric is flimsy and fiddly to handle, so I pinned and then hand basted it together to get an easier to manage machine-stitch result. After the straight-stitching I pressed the seams, then overlocked them.

Next, I straight-stitched the side-seams. Starting from the curved area of the underarms working down towards the hems. I stopped to back-stitch very carefully at the point where the top of the vent opening starts. Luckily there's a tiny overlap of the fusible stay tape at that spot to reinforce the stitches - as I was concerned that it could be a stress point and tear through when worn (eekkk!).

Then, I needed to overlock the side-seams. However, I was concerned about my iffy ability to negotiate a tight curve on the overlocker - with out fluffing it up big-time and slicing something off with the blades irretrievably. So, I first carefully cut along the cutting-line of the underarm curve and also about a further 3 - 4cm worth of the vertical-line (see photo below) and then I stopped. I figured this would make it easier for me to manipulate the fabric around a curve when I overlocked the side-seams.
 
Preparing to overlock the side-seams

I then placed the under-arm seam-allowance under the presser-foot - aligning the cut-edge of the curved-fabric against the side of the cutting blades. And, I was able to overlock easily around the corner and down the straight (sounds like driving a racing car LOL!) !  ... i.e. just as per this tip about serging inside curves here I straightened the line as I fed it through the overlocker machine as I stitched around the curve. It basically eliminated 1 out of 2 sticky areas for me - I could ignore the problem of cutting in a nice curve, and instead I concentrated on just stitching it nicely instead (yay!).

Overlocking the underarms and then the side-seams When I got close to the top of the vent opening (which I had marked off with water-erasable marker at point about 5 - 6cm above the top of the actual opening) I needed to overlap the overlocking stitches with the pre-overlocked section. It's here, that the pre-cut, pre-overlocked edges of the vent seam allowances meet up with the overlocker blade-edge as it passes through the machine towards the needles. I overlapped both sections of overlocking a little bit before trailing off the threads gently to the side (see photo below).

Trailing off the threads before reaching the top of the vent opening

Okay, so far the shoulders are sewn up, as are the vents/splits, and the side seams - only the sleeve-cuffs, neckline and hem left to write-up for posterity :) !

  
  On different tangent, but kinda related to overlocker/serger machines I spent half and hour   this evening moving all my favourite serger/overlocker pins onto a new separate Pinterest 
  board of their own (Sewing - Sergers & Overlockers: Tutorials & Tips) so I could find and
 
browse them more easily hehe
!


Next up... Part Three - Sleeve-Cuffs, Hems and Neckline


Thursday, 10 January 2013

Helen Had It! And, She Has It For You Too...


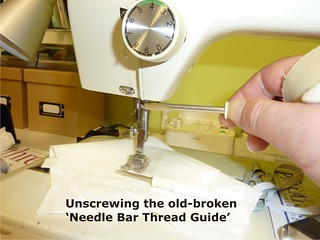
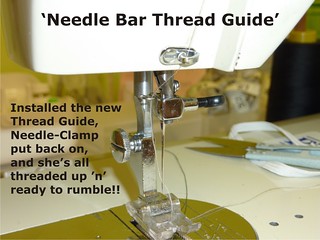
Disaster averted on the 'Needle Bar Thread Guide' front folks - yay!


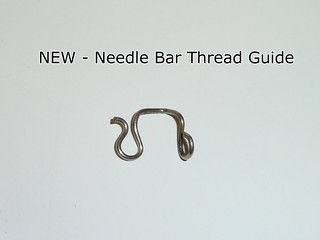
03 Needle Bar Thread Guide - Repaired (Jan 2013)

As I should of known the lovely and most helpful Helen Howes had a suitable replacement part over to me in a lickety-split, and best of all it only cost me £1.00 + the P&P ... what's not to love? I bought an extra thread guide (another £1), and a spare presser-foot (£2.50) too - all pre-loved items now finding a new lease of life with my sewing machine :)

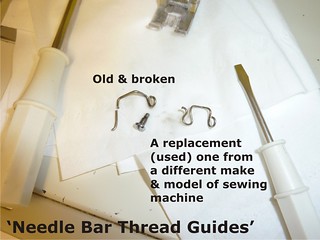
BTW I did find the broken piece from the original guide - it somehow landed onto the set of drawers directly beneath the table the sewing machine sits on - v. clever considering the drawers are about 2 ft to the right of the machine and sit flush with the front of table LOL!

The replacement is from a different make and model of sewing machine, but having seen it's photo on her website I was pretty confident it would fit and it does :)

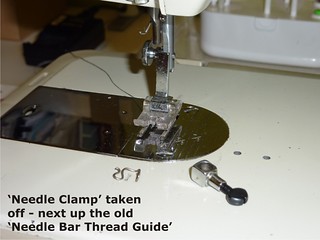
04 Needle Bar Thread Guide - Repaired (Jan 2013)  05 Needle Bar Thread Guide - Repaired (Jan 2013) 


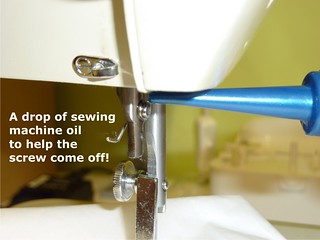
06 Needle Bar Thread Guide - Repaired (Jan 2013)   07 Needle Bar Thread Guide - Repaired (Jan 2013)


08 Needle Bar Thread Guide - Repaired (Jan 2013)   09 Needle Bar Thread Guide - Repaired (Jan 2013)

Helen's small and very friendly service is based in the UK, and she sells all sorts of bits 'n' bobs for vintage sewing machines quote: "Sewing machine parts, manuals, and spares for sale; free advice, and other interesting stuff...". I highly recommend her services - so if you need a part replaced on your favourite vintage-lovely send her an email, check out her site and see what she can do for YOU :) ... and if you can't see what you need... "I keep a Wants list - if you can't find what you want please ask... ".


Saturday, 5 January 2013

Now I'm Tilting in Green!


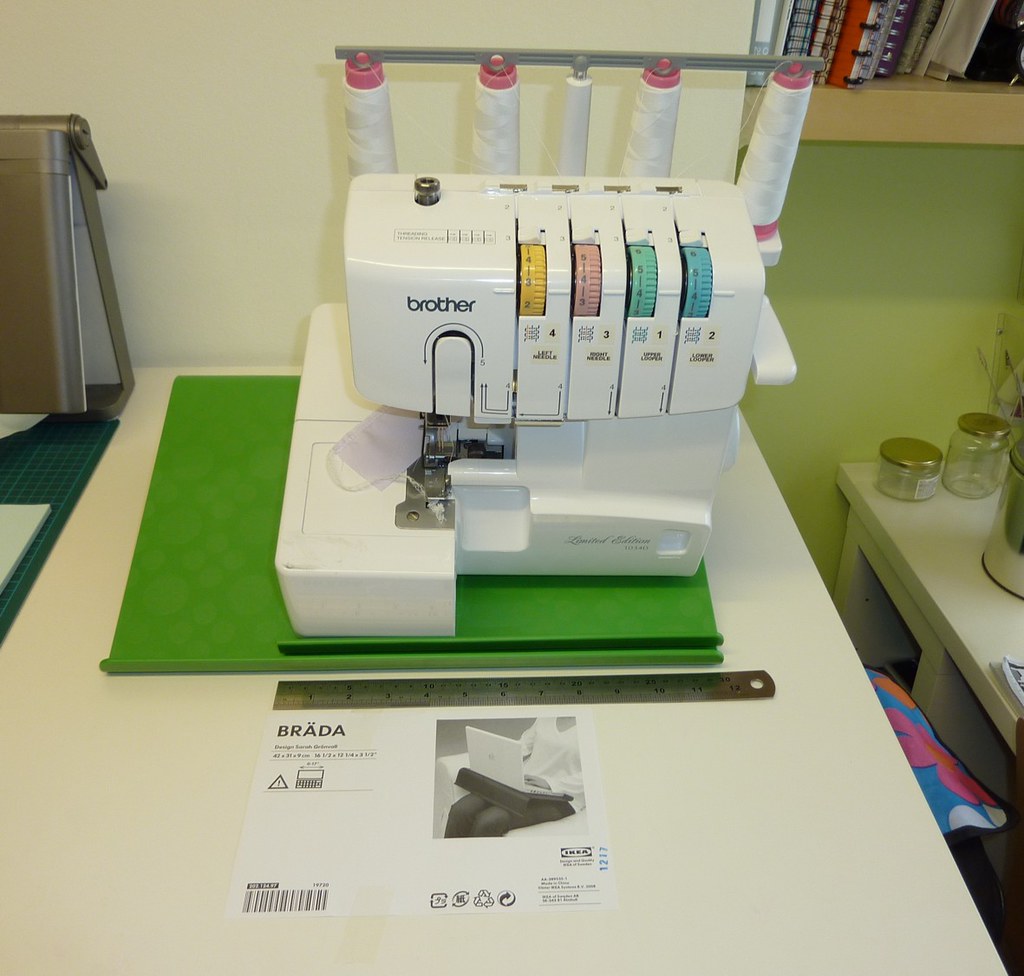
BRADA Laptop Stand - Cut down to size for a DIY Tilt Table
The cut-down stand (now 30cm/12" wide) is shown on top of a normal sized one
You might remember this post? I was trying out my black plastic laptop stand with my Overlocker (Serger). Well on Thursday I blackmailed persuaded my darling Hubby to take me to the bastion that is Swedish flat-pack heaven, and I picked up a fresh one in green (to match my sewing room décor - natch ;) !) 

Overlocker Tilt Table from Laptop Stand

If you like this tip you can Pin-It here on Pinterest :) !


We then used a spot of masking tape, a pencil, a ruler, a hacksaw and a file + smash-bang-wallop I have a new DIY-homemade-stylee tilt table :D!!

It's now 30cm wide (12 inches) and it's a tad wider than my machine (Brother 1034D) - so it doesn't take up too much width on the sewing table.

For £3.50 (or $3.99 on the IKEA US site), I'd say that was money well spent :).

NB: My Overlocker is pretty lightweight compared to my poor broken Novum (which weighs 19.8kgs / 43.7lbs). So, I don't think that this DIY solution would work for heavier sewing machines.

Don't forget! You've still got 15 more days to enter my GIVEAWAY :) 


Friday, 4 January 2013

So, Where's The *Catch Then...?


... ummm weeeellll now.... if you're technically speaking, then it'll be lurkin' on the floor somewhere (not that I haven't tried to find it on my hands 'n' knees already *sigh*).

Don't forget! You've still got 16 more days to enter my GIVEAWAY :) 

02 Needle Bar Thread Guide - Broken (Jan 2013)

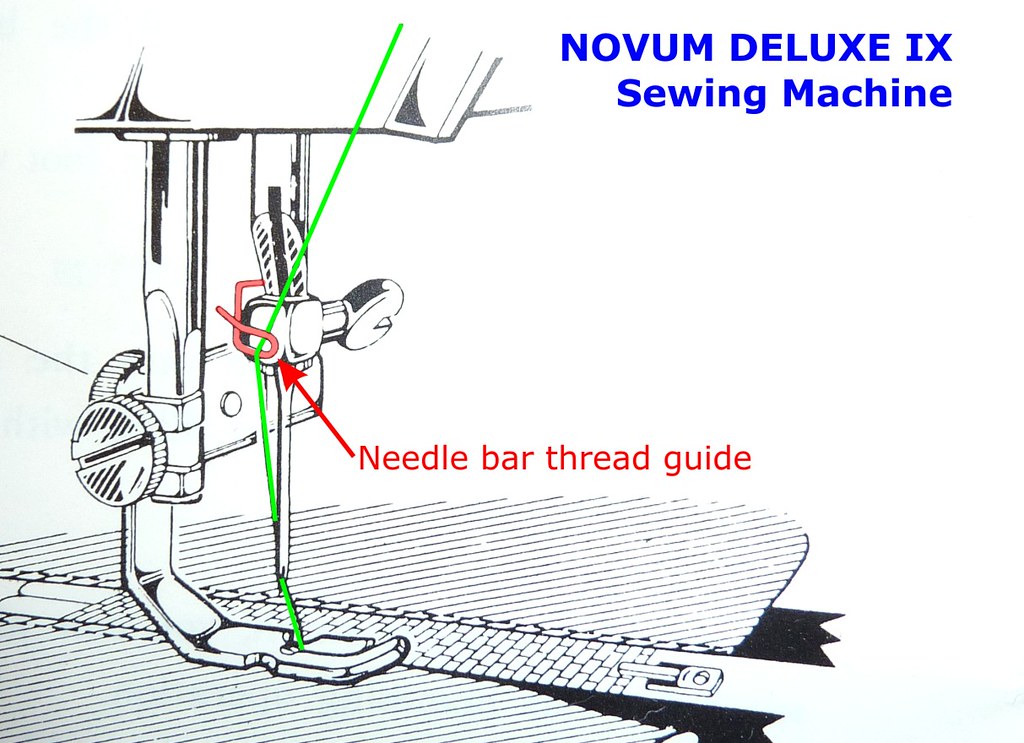
Now.... when I say "catch", I mean as in the little metal *catch that you hook your thread around last - just before it passes through the needle. (*Or to give it the full and correct title à la instruction book it's called the 'Needle Bar Thread Guide'.)

I was merrily sewing the teensiest bit of elastic, minding my own business when I heard a sharp "Ping!" and the distinct tinkle of metal. Now, at first I thought "Poo! I've broken a needle!", but nope... the needle was intact.

Then, I noticed that the thread was not lying correctly (see comparison photos above). And I realised that the last part of the thread guide had snapped off. Luckily, the machine still stitches fine - as long as I go slowly.

I also had the sense to remove the needle plate, and to clean the bobbin case, shuttle and race - as I wanted to be sure that the part that had broken off hadn't dropped down inside to jam-up or damage the mechanism (eekk! a horrid thought).
01 - Needle Bar Thread Guide - Broken (Jan 2013)
Diagram scanned from my instruction book - and colour added-in by moi ;)!

So, does anyone know where I can buy a new one, my machine is a vintage model - a 'NOVUM Deluxe IX' (sometimes listed as a 'New Mark IX' too) ? If not, then I guess I could try and fashion one from some narrow wire (the original part has a tight little loop of wire on the end that's attached to the 'Presser Bar' with a little screw.


I think I may send Helen Howes an email with pics to see if she has one for sale


Wednesday, 1 August 2012

Which Way Do YOU Tilt?...


.... your Overlocker (Serger) that is!

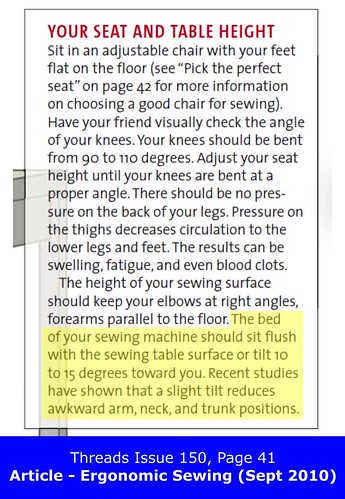
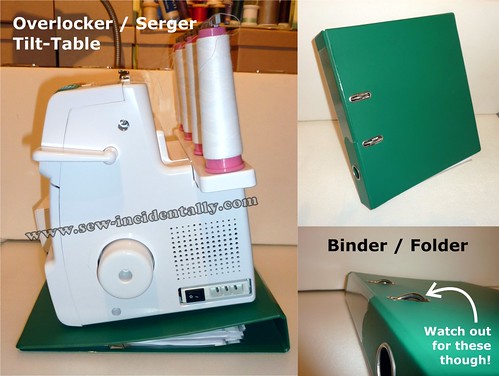
I've read in a few blogs, and in books that it's popular for sewists to tilt their sewing machines and overlockers. Basically instead of the flat-bed of your machine being parallel to the table-top surface that it is resting on; you instead raise the back of the machine higher than the front. Thus the bed surface is tilted towards you as you sit at your machine. Supposedly, this is a more ergonomic way to sew - you do not end up leaning forward as much as when the machine is not tilted. So, it should reduce aches and pains on both your neck, back, wrists and hands, and make for a more comfortable sewing experience. Another bonus is that you should have a wider and improved field of view resulting in easier and more accurate stitching.

Threads Issue 150, Page 41 - Ergonomic Sewing (Sept 2010)

I believe that tilt tables for sewing machines are very popular in the quilting and patchwork world - where a long time can be spent sat stationary in position at your machine stitching together large swathes of fabric.

Commercially sold tilt-tables (e.g.: like , this one) tend to include an lip at the front-edge (the one nearest to your body), this prevents any chance of the machine from sliding down and off (we don't want any expensive accidents or broken toes - eekk!). However many models cost anywhere from $40 USD/£25.50 GBP, to around $70/£44.50 for this one (same model is about £50 - $78.30 in the UK here) and this one, or even nearly $100/£63.80 for this one.

Now, I don't know about you - but I ain't paying those kind of prices - "No Sir!".

So, some DIY solutions I've heard of are as follows:-
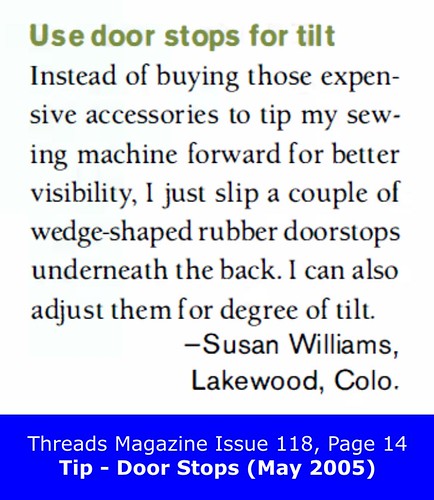
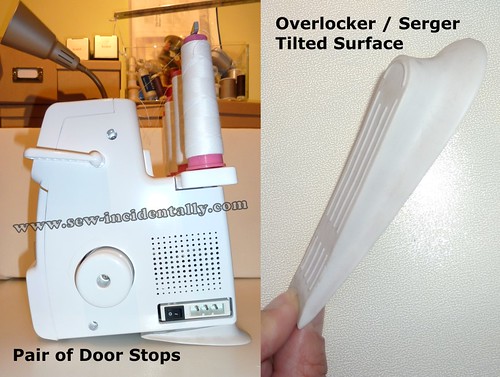
A pair of door stops! Rubber ones are best - so they grip to the machine and to the table surface slightly.
   Pros: Cheap and easy to get hold of (Pound-Shop / Dollar Store?)
   Cons: Could slip out from under the machine if nudged / knocked, nothing to stop the machine sliding off of them.

Threads Magazine Issue 118, Page 14 - Tip - Door Stops (May 2005)  02, Door Stops - Serger, Overlocker Tilting

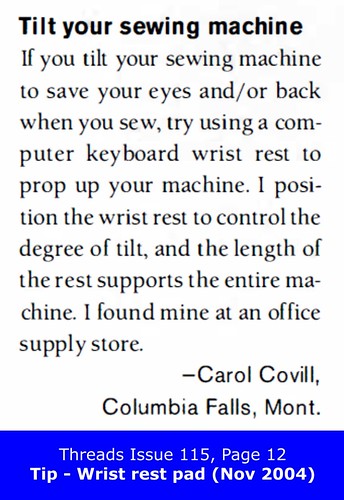
A long computer keyboard wrist-pad rest (as per this tip from Threads Magazine)
   Pros: Same as above.
   Cons: Same as above, plus - might perhaps be a bit squishy / bouncy under a heavier weight machine.

Threads Issue 115, Page 12 - Wrist rest 
pad (Nov 2004)
 
An office binder / folder (as per Tip #30 from the book: PatternReview.com 1,000 Clever Sewing Shortcuts and Tips)
   Pros: Same as above.
   Cons: Nothing to stop the machine sliding off of the file / binder.

Pattern Review Book - Tip No. 30  03, Binder or Folder - Serger, Overlocker Tilt Table

This Quilter bought a wooden tilt table for her sewing machine. Another lady made one using a pair of small, and a pair of large castors / wheels underneath a wooden base.

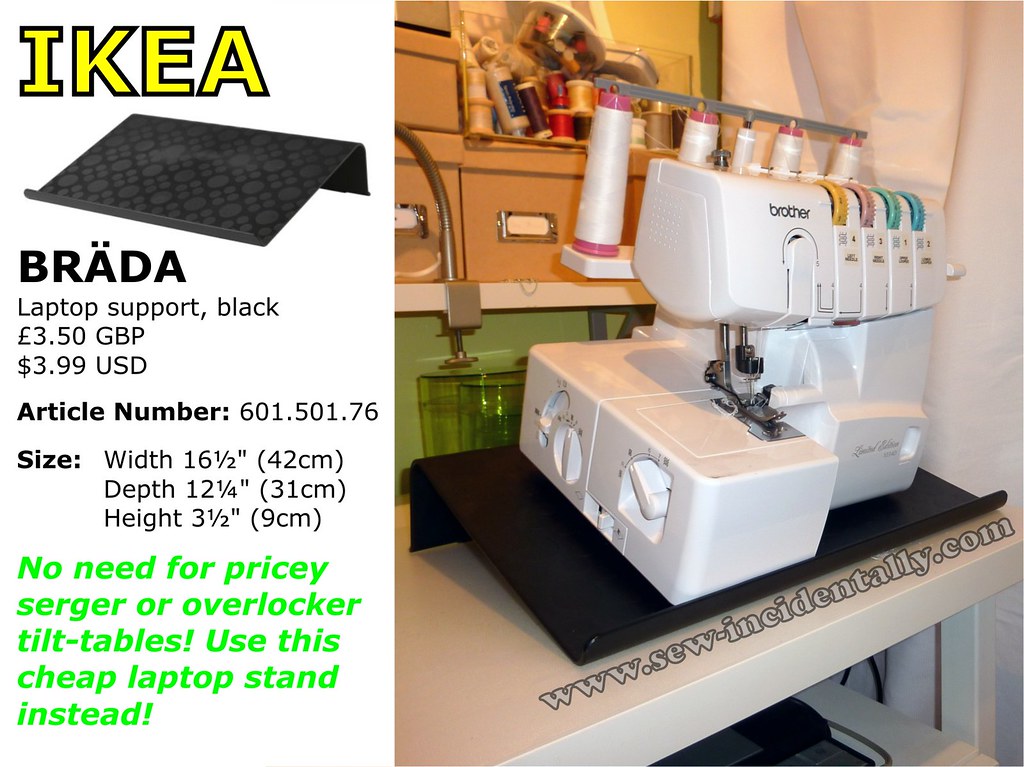
But, I've come up with another solution! And it'll only cost you £3.50 (or $3.99 in the US) plus a trip to your local IKEA...

FAIR WARNING! I think this will only reasonably work for overlockers / sergers which seem to be much lighter in weight than "normal" sewing machines. So, a vintage cast metal machine would in all likelihood bend - if not break the plastic!!

Overlocker Tilt Table from Laptop Stand

If you like this tip you can Pin-It here on Pinterest :) !

My cheapo solution is the IKEA - BRÄDA Laptop support (comes in Black or Green plastic). (Article Number: 601.501.76).

Size:    Width 16½" (42cm)
            Depth 12¼" (31cm)
            Height 3½" (9cm)

There's a rubber strip at the back horizontal-edge that prevents the support from sliding around. And, a retaining edge keeps things in place (at the lower front-edge).

If you were worried about it being to wide - you can always saw it down narrower!

Now I need to go to IKEA and buy another one - I borrowed the one above from my laptop LOL!


Wednesday, 25 July 2012

A Top, A Skip and A Jump!


(I'm paraphrasing "A hop, a skip and a jump")

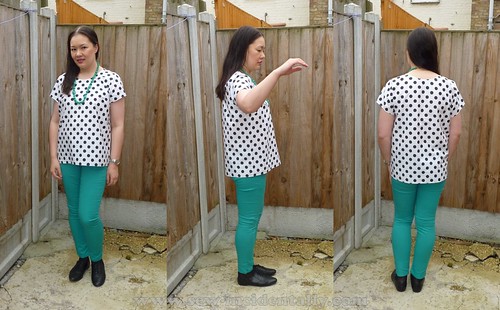
The TOP is my 2nd finished Scout Woven Tee by Grainline, I successfully finished it in time on Sunday evening (just over a week ago), and wore it to work to show-off on Monday 23rd July.

01, Scout Woven Tee - Polka Dots

I made this with fabric kindly donated by Alana from Lazy Stitching at the April 2012 Walthamstow meet-up.

I managed to squeeze it onto barely 1 metre of fabric - and I'm quite proud of my pattern matching of the spots/dots around the side-seams, and tops of sleeves. I think the spots flow quite naturally, and don't look randomly cut-off or anything weird LOL!
Check out the early-morning photos I made poor Hubby take whilst my maquillage was all fresh before leaving for work hehe! (P.S. That's shower-fresh damp hair, not greasy strands alright ;)!!)

02, Scout Woven T-Shirt, Black & White Polka Dots


Following on from the details in my previous post... I stitched shoulder-seams, followed by side-seams, then the underarm seam on the sleeves, followed by setting-in the sleeves. I made the same mistake as on my first navy collared version of the top - in that I forgot to hem the sleeves before sewing them to the bodice (doh!) - it made it a little more bulky to manoeuvre under the presser foot but not impossible. I was careful when I altered the sleeve pattern to measure the curves along the armscye of the sleeve verses the bodice armhole - as I didn't want to have to contend with too much excess ease along the sleeve cap (I found it hard to ease this in evenly on the first toile / muslin I made). So, with less than ½" (1.3cm) of ease in the sleeve cap I first pinned the sleeve to the bodice between the notch marks along the lower edge of the fabric (aligning the stitching lines I'd marked on the wrong-side of my fabric using my Saral tracing paper) then I pinned between the notches along the top of the sleeve - distributing the ease evenly. Now, the first time I tried to sew a set-in sleeve it was tricky having to constantly stop 'n' start to remove the pins as I went along. So instead, I basted by hand with some bright red thread - about 1/8" (3mm) from the marked stitching line. I basted to the side of the line that was towards the bodice - so not in the seam allowance itself. I figured that basting on that side would control any tricky ease and awkward curves better than if they were stitched together in the seam allowance area.

I pinned the bodice front pattern to my toile / muslin at the shoulder and underarm/side-seam, and centre-front neckline. Then I use a pencil to mark on the paper my "actual" BP (Bust Point / Bust Apex).

03, Marking the BP on the Pattern

I wanted to find my exact "real" BP, so I could avoid placing any of the black polka dots from my chosen fabric over the bulls-eye! I used my top-tip to avoid dodgy placement of the dots over the "girls" ;).

I followed Jen's tutorial "Getting Flat Bias Necklines" to the tee! I worked really well, and I will definitely use it again!

04, Grading Seam Allowances
Trimming / grading the seam allowance

I cut the bias binding length as follows:
Length of Actual Piece of Binding to Cut =
*Neckline Length + (2x Seam Allowance), then minus 1/8" (3mm)
(*At seam line / stitching line - NOT at fabric edge!!)
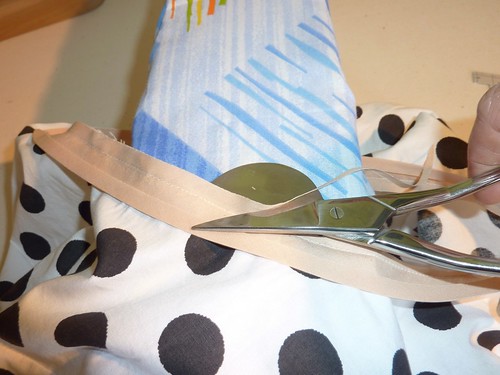
I used my duck-billed applique scissors to grade/trim the seam allowances, and I was pleasantly surprised as they really did help to avoid inadvertently  trimming the bodice fabric underneath by mistake (something I've struggled with using normal shears/scissors in the past). As you can see from the photo above the bias binding got trimmed down in half to 1/8" (3mm).

I used some nude/ skin-toned bias binding (it kinda matched for my own skin tone) to face the inside of the neckline - I picked it up at Shepherd's Bush Market when I went out with Dibs recently. I think it worked pretty well! I didn't want an extra thick doubled-up effect you sometimes get with 2 or more layers of white fabric!


05, Pinning and Pressing Bias Binding Inside the Neckline
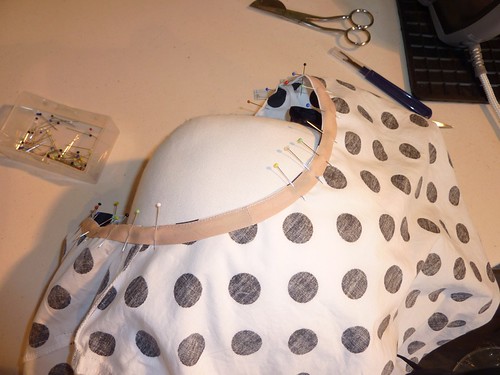
Pinning and Pressing Bias Binding Inside the Neckline on my Tailor's Ham
The bias binding is then turned to the inside. I pinned it carefully in place and pressed it between the pins (avoiding pressing over the glass head pins - which can leave marks of the pin holes in the fabric otherwise!). My homemade tailor's ham was very handy in laying out the neckline during this process - as it mimicked the natural contours of a real body well :)

Then, I hand basted in place close to the bottom edge of the binding (not so close as to catch in the machine stitches later).

Then, I stitched it in place on my sewing machine. I had the top the right-way out (not inside out) and then stitched inside of the neckline - so I could see that I was catching the edge properly of the bias binding. This means that the bobbin thread appears on the outside of the neckline, and the thread from the spool/reel shows on the inside of the neckline.

06, Finished Neckline
The finished neckline - lies lovely & flat!
Oh, and I used the new overlocker that my wonderful Hubby bought for me early this year for my Birthday (I was having trouble adjusting the tension on my old machine) to finish the seams on the inside. Handily it came pre-threaded with 4 mini-cones of white thread, so that saved me some time - but I did have a go at re-threading it and it was MUCH faster than my old Delta overlocker. I straight stitched all the seams first, and then overlocked (serged) them - I don't trust my judgement enough yet to just overlock them straight off. It was a bit slow going around the armscye seams - probably because it's such a curved line to follow, and I was worried about accidentally cutting off bits I shouldn't be with the machine's blade. But I was careful and it turned out great!

I also used seam tape to stay the shoulder seams before I overlocked them too.

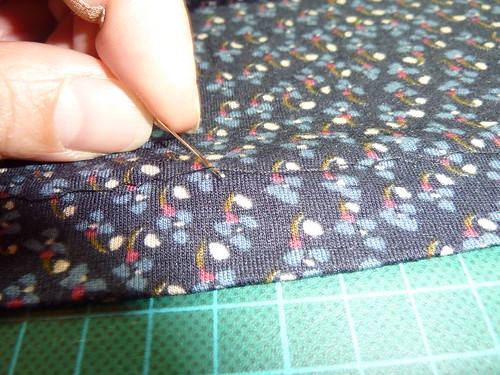
The SKIP is... skipped stitches, I got trying to zig-zag stitch the side-seams on my first attempt at Zoe's FREE vest pattern.

Skipped stitches
Opps - can we say "Skipped stitches?"

P.S. If you haven't heard of this fab little pattern - where have you been hiding ;) ? I might be biased - but download it now and give it a go! It was my first try at sewing with knits (unless you count taking in the side-seams of T-shirts with glorious abandon for the ripped straight stitches that don't give - when I was a teenager haha!), and aside from the skipped stitches (hmmm... which I think are related to pressure issues with my presser-foot) it went together really quickly!


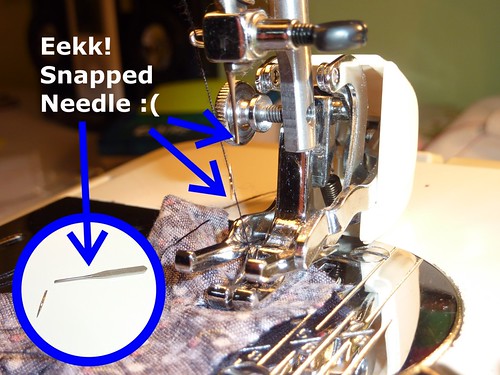
The the JUMP is the frightful jump I got when sewing my vest using my 'Walking Foot' and the needle snapped - eekk!

Broken Sewing Machine Needle
What's wrong with this picture :( ???