Pages

Thursday, 31 January 2013

My Sew-l-utions 2013... In The Jar + Stash Busting


didyoumakethat     
LEFT: Image from Karen's Blog (image by Shivani)
RIGHT: Image from Cation Designs (image by Jen)

Right-i-o, before January finishes, and the "newness" of a brand New Year feels like it is over - I want to publicly declare my sewing-intentions for this year:


This will allow me to create a range of garments (7) and accessories (2) - and hopefully try out and improve a number of new skills and techniques. That's around 1 me-made item every 6 weeks - very do-able methinks LOL!

I am coupling it with the Stashbusting Sewalong by Cation Designs and Emily aka EmSewCrazy. My fabric stash is mega, and doesn't look like getting any smaller :(! So, this will spur me on to use it up or swap-it-away (watch out ladies in Walthamstow this Saturday, as I shall have loads to swap with you ;) !)


2012 was very poor and unproductive for me in terms of sewing output (only 2 scout woven tops made, and 1 SoZo Vest) - luckily I've surpassed that poor sewing-rate this month already with a RTW copy of a top sewn up, and I've made this BurdaStyle Magazine T-Shirt already made (pattern is 02/2013: T-Shirt #126, post to follow shortly! Long-sleeve pattern here too.)

There's some very interesting plans in Karen's jar - I wish everyone the best of luck 'n' success with their sewing endeavours :)


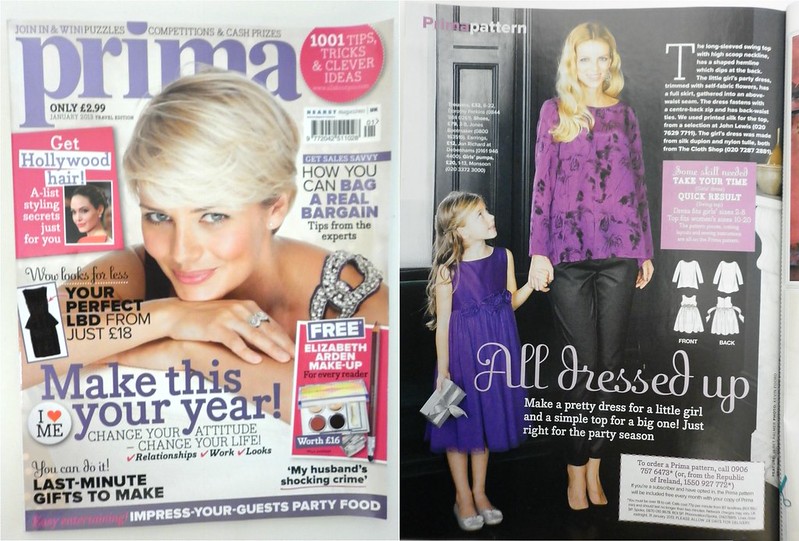
PRIMA Pattern - January 2013, Swing Top & Little Girl's Party Dress


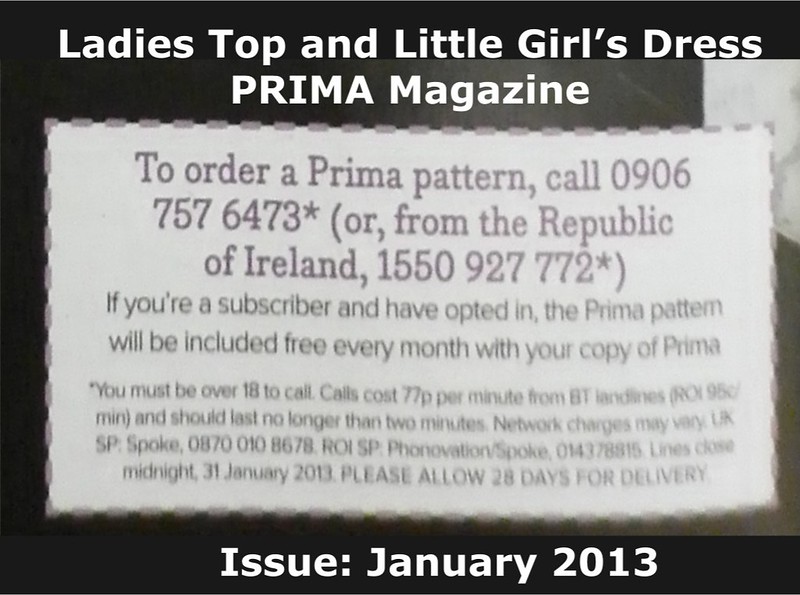
The pattern for the January 2013 PRIMA Magazine has only today (Thursday 31st January) left to order folks - so hurry up and telephone them if you  wanna get it ;) ! I Just ordered mine LOL!

Prima Magazine - Pattern, January 2013 (01)
 
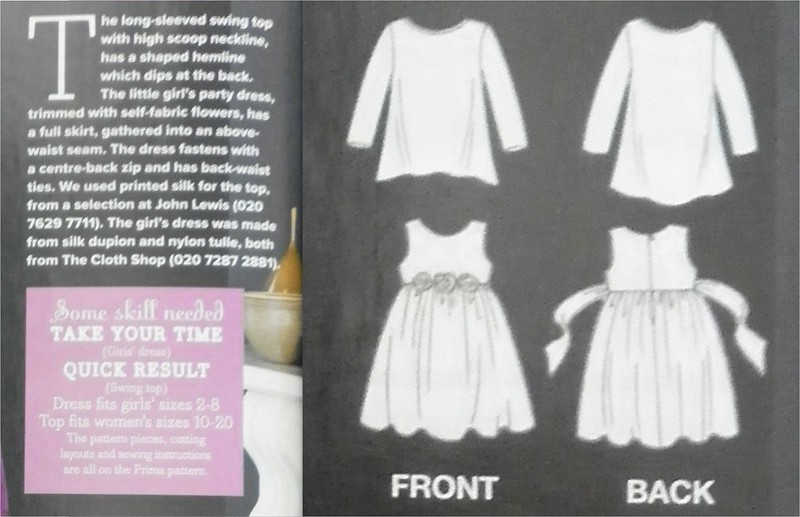
The pattern for ordering are a 2-for-1: a Ladies long-sleeved swing top with high scoop neckline, has a shaped hemline which dips at the back. And, a little girl's party dress, trimmed with self fabric flowers, has a full skirt, gathered into an above-waist seam. The dress fastens with a centre-back zip and has back-waist ties.

Prima Magazine - Pattern, January 2013 (02)

Prima Magazine - Pattern, January 2013 (03)


See my old post here on tips for ordering their patterns: PRIMA Magazine: How to Order Their Sewing Patterns.


Tuesday, 29 January 2013

First Garment Make for 2013! (Part: One - Pattern Drafting & Fabric Cutting)

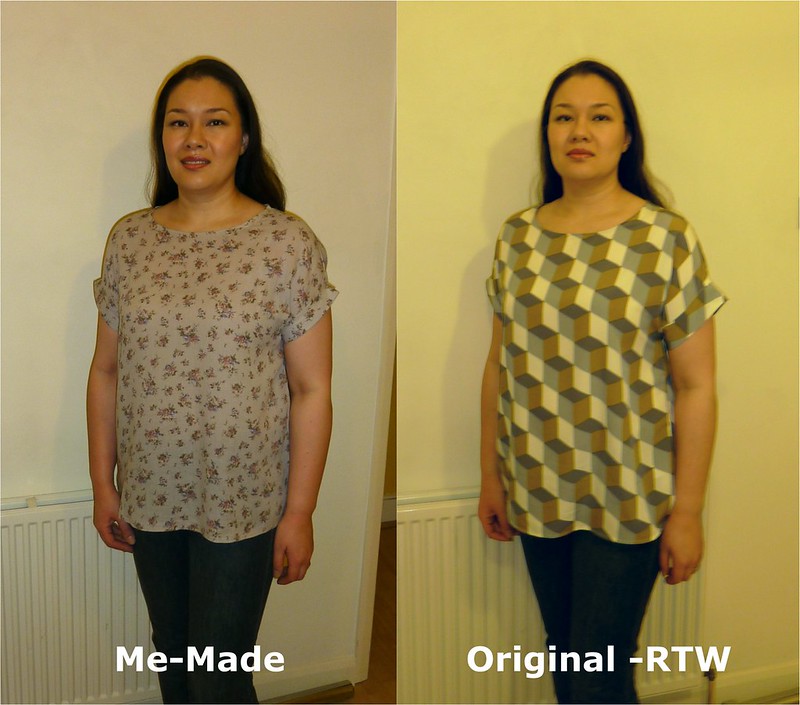
... I decided to ease myself into the New Year with a simple make I'd been planning on for a while. So, here's my rub-off copy of a RTW (ready-to-wear) top I bought last at the end of 2011 for around £23 (I'd fallen in love with the gorgeous geometric print fabric!).

Grey-Floral Crepe Top
Photo on the left taken at 7.30am, the one on the right at 7.30pm same day (hence the tired eyes LOL!)
Below is an image I found on the web of the original top (which shows it's colours better than my meagre efforts above) photo from M&S.

Inspiration: RTW Top from Marks & Spencer

The original top I'd bought from Marks & Spencer's had little cut-on cap sleeves (I'd say like kind of like an extended-shoulder seam, with a very short Kimono style sleeve as described here at the Coletterie) with cute turn-back cuffs sewn on too.

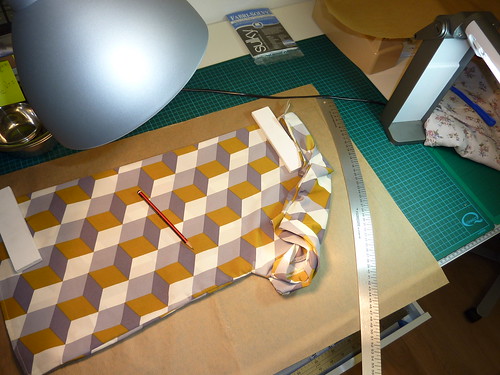
It was very easy to make the pattern - I just employed common sense when tracing the pattern pieces onto paper from the original garment. I didn't even need to consult my 2 books on coping RTW garments Patterns from Finished Clothes: Re-creating the Clothes You Love or Patternmaking for a Perfect Fit.

   
 2 great books on creating patterns from your existing garments

There are only 3 pattern pieces bodice-front, bodice-back, and the sleeve-cuffs... unless you count a moderate length of beigey-coloured 12mm (½") width single-fold bias binding that I used to bind the neckline - which I did following Jen at Grainlines fab tutorial "Getting Flat Bias Necklines" :) (last used to great success on my Spotty Scout Woven Tee top). In fact I only traced out the bodice once - and used it for both the back and front! Why you may ask? Well... the original M&S top is a loose, casual style - with no darts, and virtually no shaping. It's super easy to throw on for work, and in the right fabric can look smart - especially with neat little turn-back cuffs at the end of the short-sleeves. Therefore, front and back pieces are virtually identical - aside from the necklines... wonderful in terms of pattern tracing, and less work for moi LOL!

Copying the ready-to-wear top
Copying the RTW top onto parcel-paper
Clover Double Tracing-Wheel
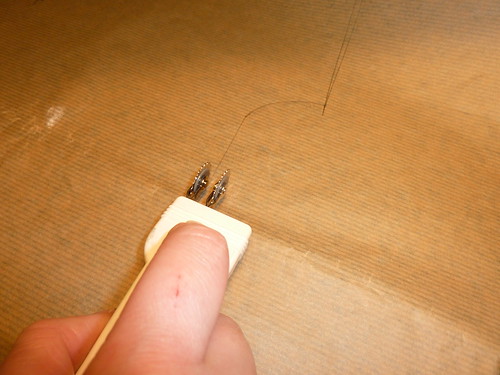
Using my Clover Double Tracing Wheel to add the 1cm seam-allowances

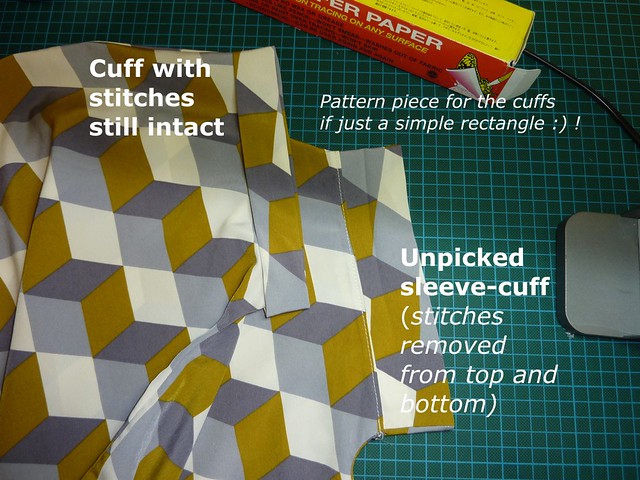
I made the seam-allowances (SA) all 1cm (3/8"), and the hem-allowance 1.5cm (5/8"). The pattern piece for the turn back sleeve-cuffs was very easy. I initially thought that the cuffs might have been shaped, or curved in some way - so I carefully ripped out the 2-3 retaining stitches with my trust seam ripper and had a look. They were just rectangles - yay! So, the pattern pieces are just 11cm x 42cm (4 5/16" x 16½").

Checking out the turn-up sleeve cuffs


  TIP: I Found this handy site for converting between cms & inches 
  - it shows the imperial measurements in fractions ;)! You can still do it the old fashioned way:
 
  X cm ÷ 2.54 = Y inches, 
  E.g. 10cm ÷ 2.54 = 3.93 inches (or the website says = 3 15/16") 

  or A inches x 2.54 = B cm 
  E.g  11 13/16" x 2.54 = 30.00375cm (i.e. the length of a standard classroom  ruler ;)!)

  (With 1mm = 0.1cm, 10mm = 1cm - in case you're playing around in millimetres too.)


Next, to decide which fabric to use. The original is 100% polyester - but in an almost silk-like drapey finish which I wanted to recreate as much as possible.  Having seen Winnie's recent make I remembered that I had the same fabric already in my stash + extra bonus, it was already pre-washed :) (Winnie got her fabric in a swap with Jane - we both bought the same fabric for only £2 / metre at this lovely meet-up back in April 2012).

So, the soft lovely lightweight grey floral fabric it was then! (I don't know the fibre content but it's possibly got some viscose or cotton in in - as it doesn't feel artifical/polyester-ey or acrylic in anyway.)

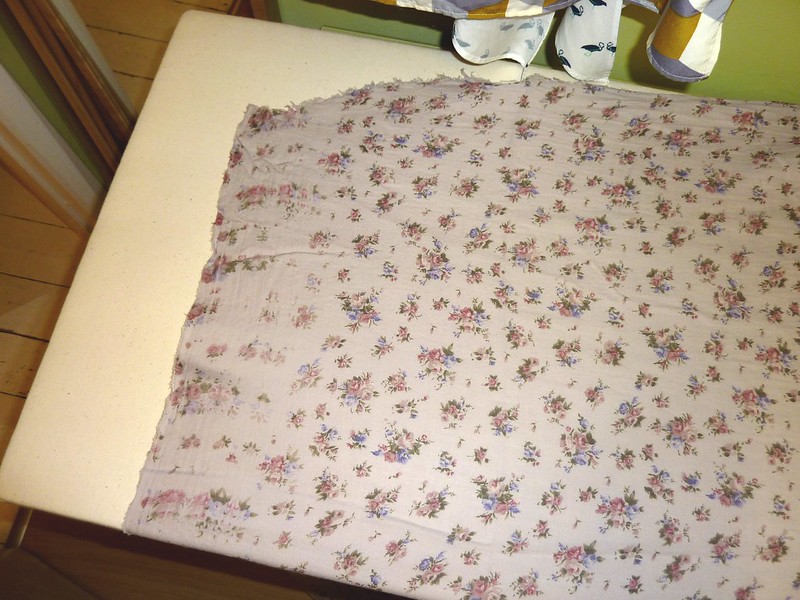
Cutting out was interesting as the printed fabric was a bit poorly printing along one of the selvedges - but it was easy to avoid.

Badly printed Grey-floral crepe fabric
Can you see the dodgy-area of poorly printed fabric down the left-hand side ?

And, I've drawn a conclusion about my fabric cutting-style "I do not like cutting on the fold!". I find it fiddly to line everything up neatly, and I feel I can save fabric more if I use a single layer. So, for this make, and going forward I'm going to make sure and pattern pieces I use that say cut on the fold - that I trace out and tape on their matching mirrored missing side.

Due to the lightweight nature of the fabric I knew that I'd need to stabilise the neckline, shoulder-seams (front + back - as I was concerned about tearing), thicken-up the sleeve-cuffs (so they don't flop down and get all narrow/wrinkled and unsightly looking) and possibly beef-up the 2 simple little side-vents a bit too.

So, I did some test samples with various fuseable, iron-on stay tapes in my stash (utilising my trusty iron + point-presser clapper to ensure good results) to check for: 
a) durability (I didn't want them to bubble, or warp, or come off as soon as I glanced in their direction LOL!)
b) colour match (NB: the fashion fabric is light weight - so there's the possibility of show-through from underneath)
c) weight (as I want added strength, but not stiffness!)

Fusible Knit Stay Tape (Narrow Interfacing Strips)
The different knit fusible stay tapes
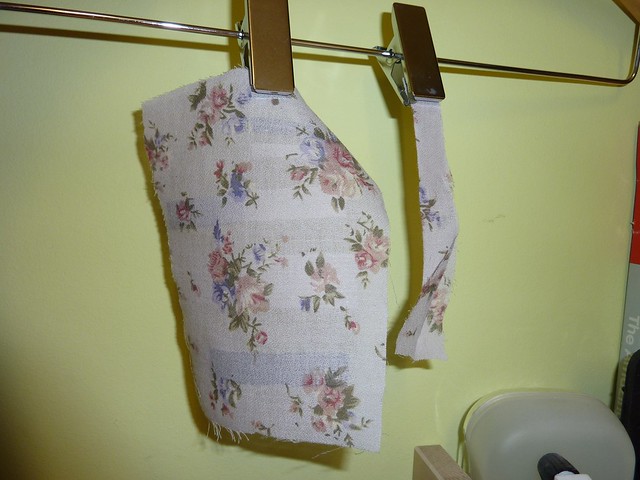
Fused samples of knit stay tape on lightweight grey-floral crepe fabric
Fused fabric sample
I tested some Extremely Fine Fusible Knit Stay Tape from Sunni's store in both Ivory and Black. It fused very well in both colours, and had a great flexibility still to it - which I had expected, with it being a knit-tape. I also tried a Prym Tape from John Lewis (called 'Edge Tape Interfacing' in 10mm, White). All the stay tapes performed very well... so it was just down to colour! Due to the semi-opaque nature of the fabric I was worried about show-through from the stay-tapes. So, I held them up to the light to judge on the best one - I even tried cutting them in half-strips to make them narrower and less visible. I also tried layering tapes onto of each other ivory first then black, and vice-a-versa... I guess I was hoping it'd sort of turn grey together when viewed from the front, and I was willing to give it a go if it didn't turn out too stiff LOL!

The best in the end was the Ivory tape from Sunni. I cut it into narrow half-width strips; all the better to reduce it's visibility from the outside. Due to the flexible-nature of the knit it was very easy to apply around curves, without any need for clipping - yay!

As I now prefer to do it this way; I do not cut out the neckline from the rest of the fabric until I really have too. I feel it is easier to handle, and far less likely to warp and stretch out of shape this way (especially on this delicate lightweight crepe fabric). To my mind, it saves me a headache and what little fabric I would of saved had I gone ahead and cut it out the "usual" way I can live without ;) LOL!

So, I fused along the stitching line - saving the cutting out of the neckline for later (until after I've sewn the first stage of applying the bias-binding facing to the outside of the neckline - which is just before turning it to the inside and stitching it down again).

Next up... Part Two - Overlocking and Vents


Monday, 28 January 2013

... And You Thought Christmas (2012) Was Over!!!


... it ain't over till the fat lady sings box arrives! Thanks to the proclivities of the international mail system, my Christmas-time bundle of joy from Christina at this, that, the other thing (as part of VickiKateMakes's Sew Very Merry Christmas Swap - see my other post here) finally arrived to the UK from the US of A, and cleared it's way through Customs at the end of last week.

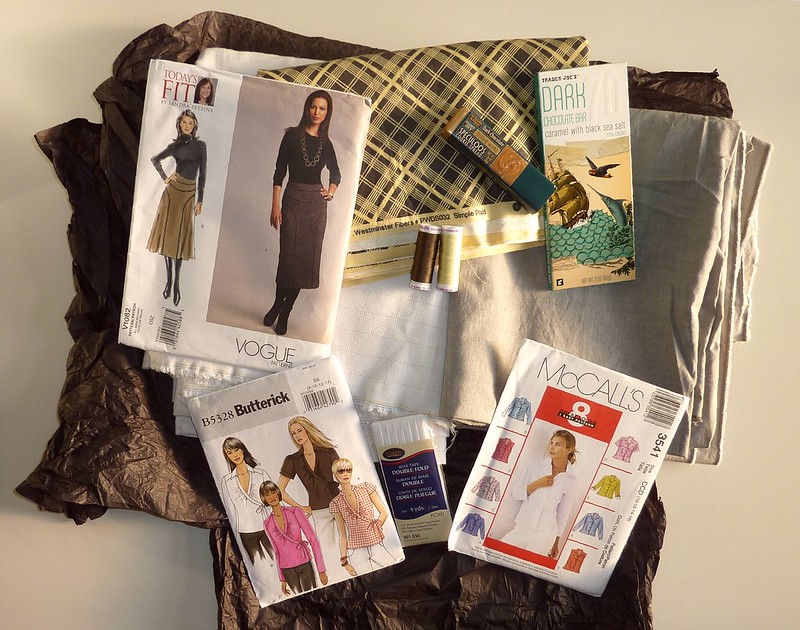
Here's a gratuitous pic of the booty!

Christmas Presents 2012
  • Vogue V1082 - Mid-Calf Length Skirt Pattern (OOP - Out-of-print).
  • Butterick B5328 - Semi-Fitted Wrap Top Pattern (OOP)
  • McCalls 3541 - Shirt Pattern (OOP - sorry no links on the BMV site for this one.)
  • 2 reels of Cotton Thread by Mettler (a brand I've not seen in the UK, will be interesting to try it!)
  • Some ¼" (6mm) Double-Fold White Bias Binding - which I think is the same as ½" (12mm) on a single-fold (bias binding sizing confuses me at the best of times :( !)
  • 3 pieces of fabric: an off-white striped (cotton) medium weight fabric, a lovely light grey fabric in what feels like a cotton/linen blend (perfect for a summer time casual men's shirt), and a brown/pale-yellow checked (Plaid?) fabric - which is printed on the diagnol, i.e. if you cut it on the straight of grain then the printed-fabric looks like it's on a 45 degree angle.
  • Oh, and some Trader Joe's Dark Chocolate too!  ..."NOT" that it lasted long in our house LOL ;)!

So, a big THANK YOU goes out to Christina for my lovely Sewing gifts! I hope you enjoy the sewing-goodies that I sent to you too :)


Sunday, 20 January 2013

THE GIVEAWAY RESULTS - Congratulations to the 2 Winners!


My thanks to the 45 sewing-fans who entered my Giveaway!

Of the comments, numbers 7 and 11 were drawn at random - so congratulations to Miffy (@sewsarahsews) and Kat (Macksa of Modern Vintage Cupcakes) on winning your sewing goodies!


Ladies - I've emailed you both today to ask you for your postal address - I hope to send your bundles of joy out by the end of this week.

Please email me your address(es) by end of Wednesday 23rd January - if I don't hear from you by then I'll pull another name out of the proverbial hat to receive the goodies :) (Email me at: sew[dot]incidentally[at]yahoo[dot]com )

Well done and please do let me know what you make using your new toys :)

Spookily enough Kat (in New Zealand) was the lady who sent me my Secret Santa Gift (Kat the choc was yummy BTW ;)!).. so clearly she received good Sewing-Karma from her Christmas-time giving; as the Sewing Gods have seen fit to steer the hand of fate and bestow one of my bundles to her all the way in the Southern Hemisphere :)!


Friday, 18 January 2013

GIVEAWAY... Don't forget to enter, only 1 day to go!


These lovely goodies are all waiting to go to a new home... could it be yours?
Enter my GIVEAWAY before 12pm this Saturday 19th January (UK time) to find out!
And... remember there will be 2x lucky giveway bundles up for grabs :)
(EDIT: Please go to the GIVEAWAY post to enter folks - it has all the entry details /stuff about my needing your email addresses to contact you etc. etc. in it over in that post :). Comments on this post so far will still count, but I've turned off any new comments on this reminder post.)

Giveaway montage photo
In the meantime I'm off to work on my 2nd me-made-garment of 2013 (progress-posts to come soon) LOL!


Friday, 11 January 2013

... Yes, She's Back in Blogland Folks!


... the rare lesser-spotted Elaine has been spied back in blogland folks, and this time (last heard from in May 2012) she's been sewing for wait for it HER WEDDING... click here to read more :)

For those who've not heard of The Selfish Seamstress a) where have you been? And, b) do go and check out her FAQ page, it's hilarious :) I love her sense of humour, and her sewing too of course ;)!


Thursday, 10 January 2013

Helen Had It! And, She Has It For You Too...


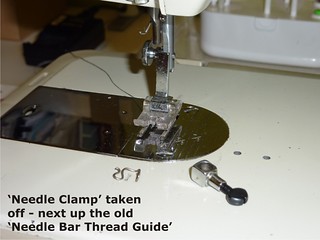
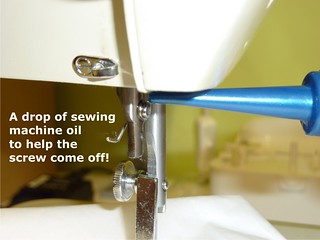
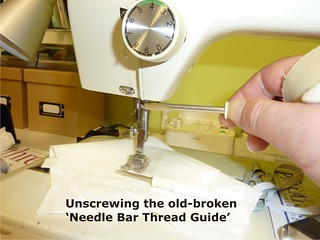
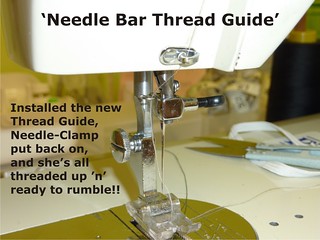
Disaster averted on the 'Needle Bar Thread Guide' front folks - yay!


03 Needle Bar Thread Guide - Repaired (Jan 2013)

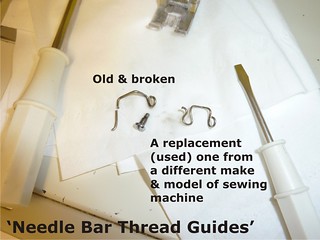
As I should of known the lovely and most helpful Helen Howes had a suitable replacement part over to me in a lickety-split, and best of all it only cost me £1.00 + the P&P ... what's not to love? I bought an extra thread guide (another £1), and a spare presser-foot (£2.50) too - all pre-loved items now finding a new lease of life with my sewing machine :)

BTW I did find the broken piece from the original guide - it somehow landed onto the set of drawers directly beneath the table the sewing machine sits on - v. clever considering the drawers are about 2 ft to the right of the machine and sit flush with the front of table LOL!

The replacement is from a different make and model of sewing machine, but having seen it's photo on her website I was pretty confident it would fit and it does :)

04 Needle Bar Thread Guide - Repaired (Jan 2013)  05 Needle Bar Thread Guide - Repaired (Jan 2013) 


06 Needle Bar Thread Guide - Repaired (Jan 2013)   07 Needle Bar Thread Guide - Repaired (Jan 2013)


08 Needle Bar Thread Guide - Repaired (Jan 2013)   09 Needle Bar Thread Guide - Repaired (Jan 2013)

Helen's small and very friendly service is based in the UK, and she sells all sorts of bits 'n' bobs for vintage sewing machines quote: "Sewing machine parts, manuals, and spares for sale; free advice, and other interesting stuff...". I highly recommend her services - so if you need a part replaced on your favourite vintage-lovely send her an email, check out her site and see what she can do for YOU :) ... and if you can't see what you need... "I keep a Wants list - if you can't find what you want please ask... ".


Saturday, 5 January 2013

Now I'm Tilting in Green!


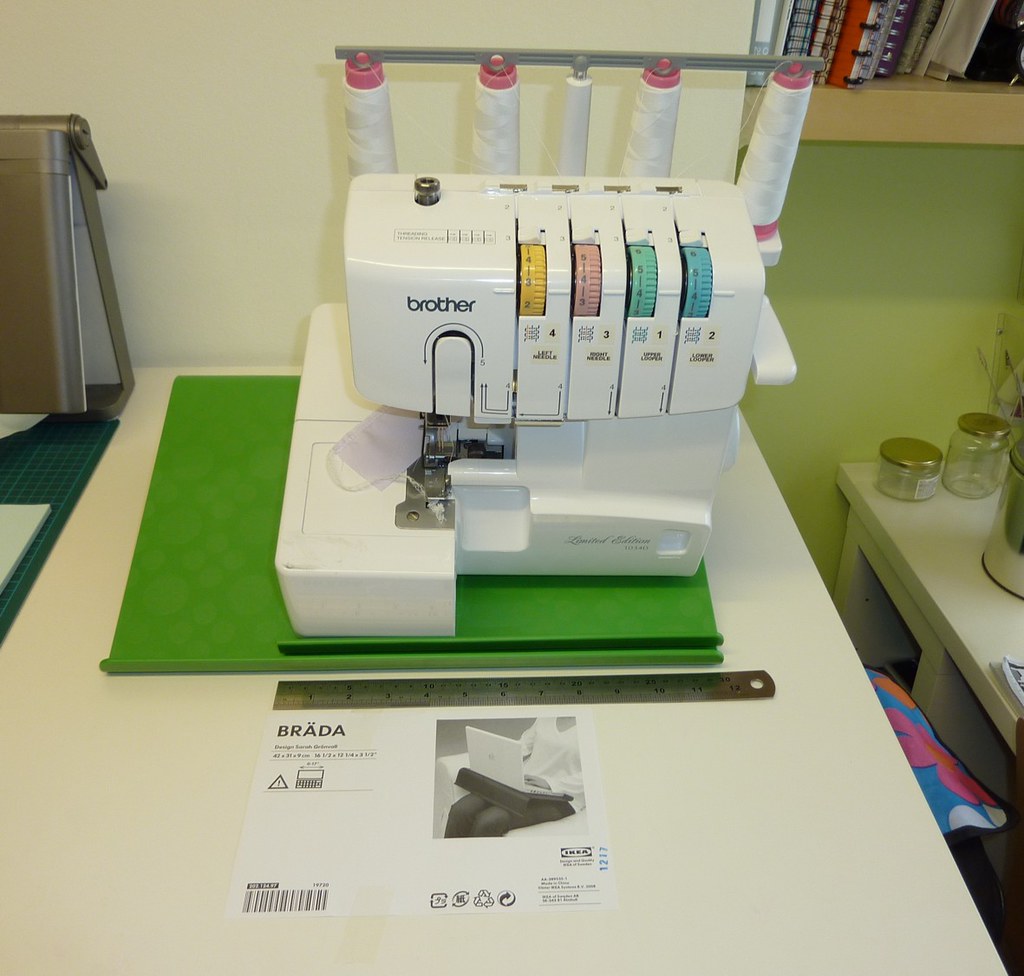
BRADA Laptop Stand - Cut down to size for a DIY Tilt Table
The cut-down stand (now 30cm/12" wide) is shown on top of a normal sized one
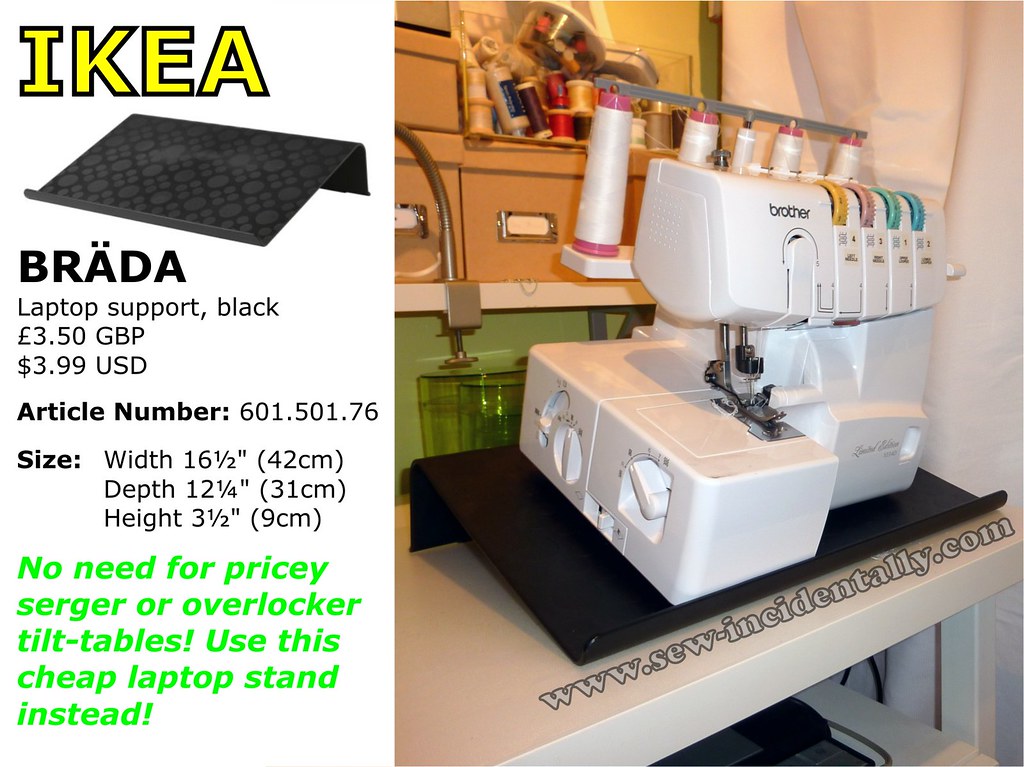
You might remember this post? I was trying out my black plastic laptop stand with my Overlocker (Serger). Well on Thursday I blackmailed persuaded my darling Hubby to take me to the bastion that is Swedish flat-pack heaven, and I picked up a fresh one in green (to match my sewing room décor - natch ;) !) 

Overlocker Tilt Table from Laptop Stand

If you like this tip you can Pin-It here on Pinterest :) !


We then used a spot of masking tape, a pencil, a ruler, a hacksaw and a file + smash-bang-wallop I have a new DIY-homemade-stylee tilt table :D!!

It's now 30cm wide (12 inches) and it's a tad wider than my machine (Brother 1034D) - so it doesn't take up too much width on the sewing table.

For £3.50 (or $3.99 on the IKEA US site), I'd say that was money well spent :).

NB: My Overlocker is pretty lightweight compared to my poor broken Novum (which weighs 19.8kgs / 43.7lbs). So, I don't think that this DIY solution would work for heavier sewing machines.

Don't forget! You've still got 15 more days to enter my GIVEAWAY :) 


Friday, 4 January 2013

So, Where's The *Catch Then...?


... ummm weeeellll now.... if you're technically speaking, then it'll be lurkin' on the floor somewhere (not that I haven't tried to find it on my hands 'n' knees already *sigh*).

Don't forget! You've still got 16 more days to enter my GIVEAWAY :) 

02 Needle Bar Thread Guide - Broken (Jan 2013)

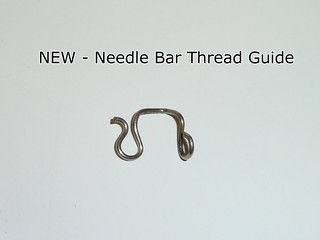
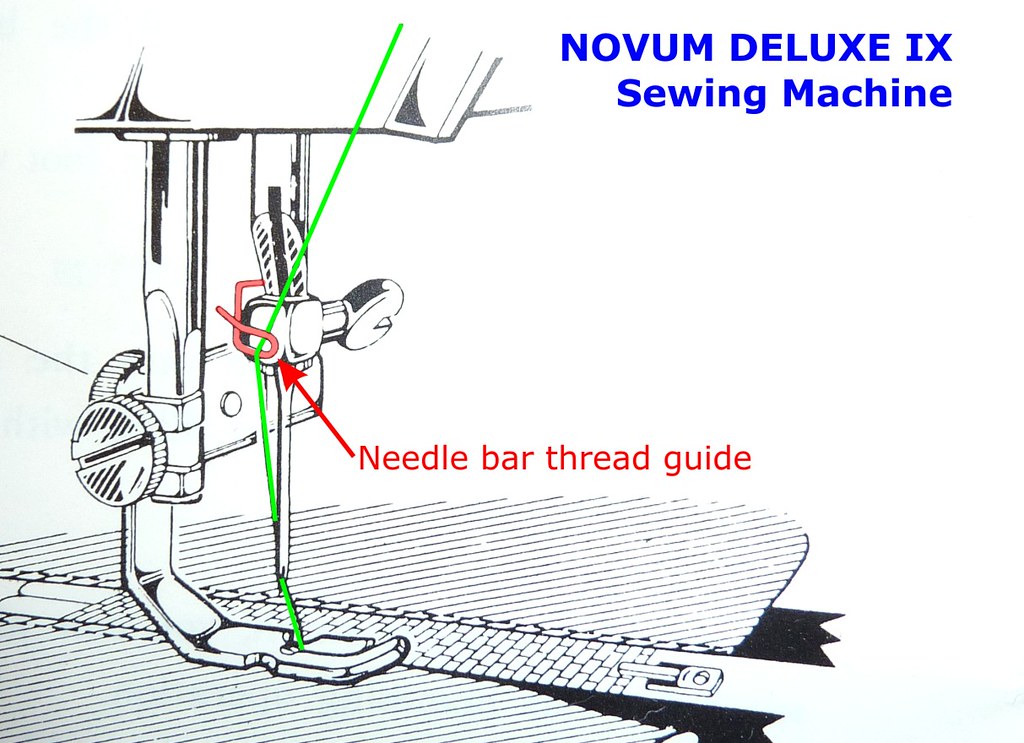
Now.... when I say "catch", I mean as in the little metal *catch that you hook your thread around last - just before it passes through the needle. (*Or to give it the full and correct title à la instruction book it's called the 'Needle Bar Thread Guide'.)

I was merrily sewing the teensiest bit of elastic, minding my own business when I heard a sharp "Ping!" and the distinct tinkle of metal. Now, at first I thought "Poo! I've broken a needle!", but nope... the needle was intact.

Then, I noticed that the thread was not lying correctly (see comparison photos above). And I realised that the last part of the thread guide had snapped off. Luckily, the machine still stitches fine - as long as I go slowly.

I also had the sense to remove the needle plate, and to clean the bobbin case, shuttle and race - as I wanted to be sure that the part that had broken off hadn't dropped down inside to jam-up or damage the mechanism (eekk! a horrid thought).
01 - Needle Bar Thread Guide - Broken (Jan 2013)
Diagram scanned from my instruction book - and colour added-in by moi ;)!

So, does anyone know where I can buy a new one, my machine is a vintage model - a 'NOVUM Deluxe IX' (sometimes listed as a 'New Mark IX' too) ? If not, then I guess I could try and fashion one from some narrow wire (the original part has a tight little loop of wire on the end that's attached to the 'Presser Bar' with a little screw.


I think I may send Helen Howes an email with pics to see if she has one for sale


Tuesday, 1 January 2013

My Second Blog-i-versary, and a GIVEAWAY!!!


The Giveaway is now closed - please see the results here :)

HAPPY NEW YEAR EVERYBODY! 2012 went by in a flash, and here I am about to embark on my 3rd year of blogging :)

As per my first anniversary post last year, I'd like to celebrate the passing of the old year, and the coming of the new one by giving back to the sewing community and by holding what shall now be my ANNUAL GIVEAWAY (yay!)

  
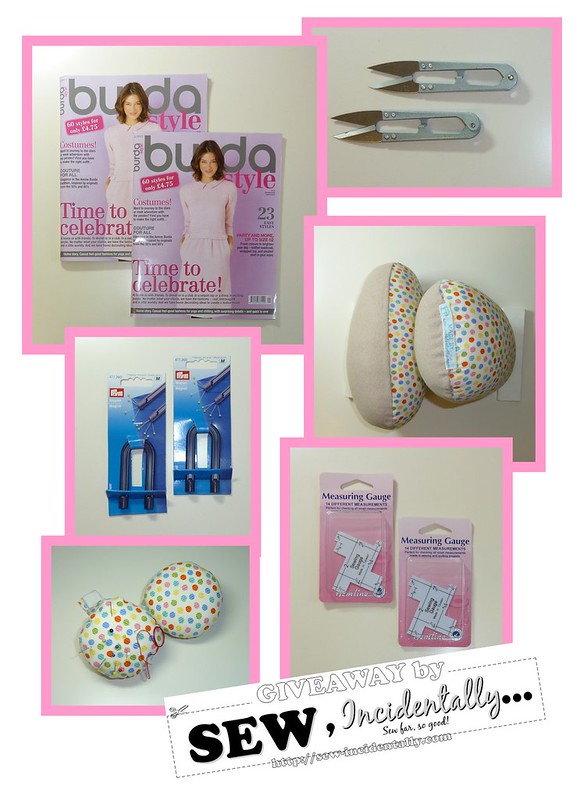
  And here's the list of goodies in my special sewing-bundle of fun :)

  1. A brand new copy of Burda Style Magazine.
     The January 2013 issue (natch ;) !).
  2. A handy-dandy little Measuring Gauge - 14 different measurements from 1/8" up to 2" 
     (
I have a few of these things scattered strategically around my sewing room!)
  3. A pair of lovely sharp Thread Snips - just perfect to keep right next to your sewing machine.
  4. A useful Magnet - to help you quickly grab any spilled pins in a hurry - without pricking your fingers.
  5. A cute elasticated Wrist Pincushion - have your pins (and needles too) with you wherever you may
     wander.
  6. And, finally what I consider "le pièce de résistance" a Tailor's Pressing Ham -
     approximately 24cm long x 14cm wide x 12.7cm tall (9
½ x 5½ x 5 inches).

     BTW - The last 2 items are hand-made by yours truly! (Tutorial posts to follow imminently.)
 

And... just 'cos it's to celebrate the 2nd year of my blog... I'm giving away 2-SETS of everything. So, yup - there will be 2x lucky giveway bundles up for grabs :)
Giveaway montage photo
Yup - you're not seeing "double" LOL! I'm giving away 2-sets of 1 of everything you see above :)
P.S. Sorry for the late at night time post... I have just finished stuffing and stitching together the pressing hams so I could take their photo for the pic above (hehe!).


  Here's how to enter the GIVEAWAY... 
   [ENTRIES WILL CLOSE ON SATURDAY 19th JANUARY 2013 AT 12.00PM UK TIME. ENTRIES ARE ELIGIBLE FROM
   BOTH UK AND INTERNATIONAL READERS. WINNERS NAMES WILL BE DRAWN AT RANDOM. THE 2-WINNERS WILL
   BE ANNOUNCED ON SUNDAY 20th JANUARY 2013!]
 
  1. You must be a follower of my blog please.
   (Please see 'Google Friend Connect' or 'Bloglovin' in the side bar on the right of this page).

  2. Please leave a comment in this post below.

  3. Please, please ensure that I am able to contact you if you're a lucky winner! Make sure
     that your comment is associated to your blog/profile
. If you want to leave an email address in
     your comments feel free to do so - but to reduce
the chances of you receiving tonnes of spam to your inbox, please
    post it in the style: name[at]domain[dot]com
.


  4. [OPTIONAL] Oh, and do please share you're favourite sewing-moment of 2012, I'd love
     to know what special creation, fabric or new skill brightened up your year! Perhaps you're
     looking forward to sewing something special in 2013 - come on spill the beans!


Good luck! And may 2013 bring you much health and happiness!