Pages

Tuesday, 31 January 2012

Random Happy Things!

.


Seems the postie everywhere is delivering happy little bundles of sewing joy! And, lucky me I'm included :)


Pleasant postal packages...
My own copy of Tasia's Renfrew Knit Top Pattern arrived today - I'm on her mailing list, so I took full advantage of her free shipping option for pre-ordered (hehe). The free shipping deal has ended now, but the tops are now in stock at her Sewaholic.net pattern store.


I also ordered some needles from here (which arrived last week): GoneSewing.com – Ballpoint needles as I realised all I had were Universal ones at home LOL :)! I wanna be prepared – already have a lovely range of washed and ready knits just crying out to be made into Tee’s plain black, white, dusky pink, dusty blue, and a navy/white stripe.


Another postal delivery today was this cute set of cookie/biscuit cutters... in wait for it.... sewing shapes! Yes, I can now EAT sewing too ;) There's a sewing machine (looks kinda of like a vintage singer in shape), a thimble, a thread spool, and some scissors - too cute to resist I had to buy them.


I'm over, the overlocker blues...

And, in other news I FINALLY managed to sort out my overlocker. If you recall I went on a beginner's class in August '11 with the delightful Karen of DidYouMakeThat?. We had a fab time learning on our own machines that we'd dragged along with us - but my Delta Overlocker refused to co-operate. At the time the differential feed adjustment knob refused to budge. Well now it's working and all is right once again. Some sewing machine oil, a little patience and a strong grip on the pliers can work wonders dontchaknow ;)


I threaded-up my overlocker this morning before work, and tested her out this evening


I plan to overlock the insides of my Scout Woven Tee (a downloadable pattern I bought from the grainlinestudio.com). So, I've run a few test swatches on the scraps leftover from cutting the fabric for my top. I used different coloured thread - to match the dials on my machine, and make my life as a v .v. v beginner at overlocking easier. The coloured thread meant I could see exactly which thread tensions to adjust! So, I've labelled my swatches to keep for reference - so I don't forget LOL.


My successful test  swatches, carefully labelled for filing and future reference!

Now, I'm off to fill up some bobbins with dark navy thread (to match my top) and spend another 15mins re-threading the overlocker ready to sew... wish me luck!

Saturday, 28 January 2012

Sewing Spaces... Drawers for Drawing, Wheels for Wheeling! (Part 2)

.

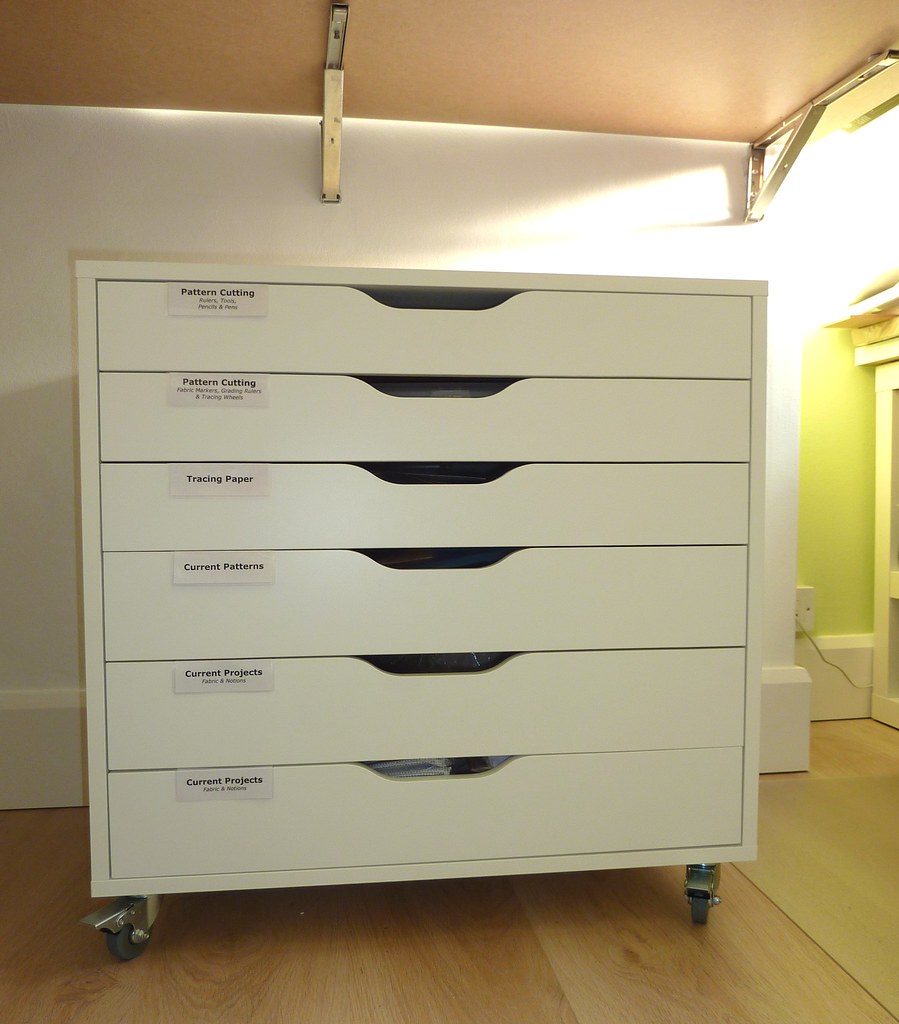
03 - Labelled Drawers

Following on from my last post... here's my tutorial explaining how I joined the 5th + 6th drawers on my together on my IKEA: ALEX Drawer Unit.

Why would I want to mess around with my furniture? Well to quote my post from yesterday...

"I wanted a place to neatly store projects in-progress, i.e. cut-out fabric for half-finished garments etc. . And, even though the bottom drawers are slightly deeper than the top-3, I needed more space than they were able to give as provided. So, seeing as this unit is flat-pack assemble it yourself stuff I simply choose to omit the hardboard base/bottom from the 5th-drawer down."

How did I achieve this? Ahhh easy peasy! All it takes is some mending plates, and some woodscrews to create a single deeper drawer - perfect for me to store my current projects in progress. Plus, it was very simple and cheap to do - and no special skills required!

-----------------------------------------------------------------------------------------

 How to Join 2-Drawers Together... 

If you fancy making a similar mod to some flat-pack drawers here's how I did it.

Tools and Supplies Used


Tools/Equipment:
Supplies/Materials:

• Pencil
• Bradawal
• Tape Rule  / Ruler
• Crosshead Screwdriver


Optional: 
• Hammer (to assist with bradawling)
• Drill
• Drill Bit, 2mm / 5/64") (optional to pilot holes on drawer fronts)


• 12x of 6g, ½" countersunk wood screws (crosshead/ pozi-drive)
• 6 flat, metal mending plates 75mm (approx. 3") or longer


TIPS:  
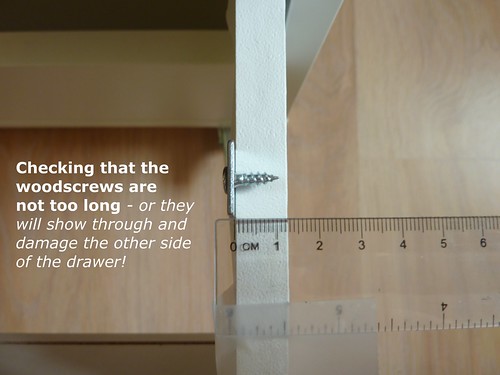
(1)   Make sure that your screws are not too long to go through and out of the other side of the drawer-sides! My IKEA drawers-sides are 12mm thick (a smidgen under ½") so my *½" screws + the thickness of the metal on the mending plates means the screws will "just" be this-side of okay.

Checking that the screws are not too long

(2)  Use crosshead woodscrews - not slot-headed ones. The crosshead screws (some will be labelled pozi-drive on the packaging too), are much easier to screw in than slot-headed screws, which have a tendency to allow the screwdriver to slip out suddenly.

Crosshead Woodscrew

(3)  Check the distance the mending plate needs to reach
to bridge the gap between the 2 drawers you're joining together - so you buy the right size. You don't have to buy the straight-line style I used, if a different shape (they sell T, and L's for different purposes too) is long enough to do the job then go for it! The plates I've used are 75mm long (3" approx.).

Checking the distance of the gap between drawers


(4) Position the mending plates carefully so that the holes are NOT aligned with any metal runners, or other hardware. You don't want to interfere with the smooth action of the drawers and make them warped or get stuck suddenly and jam.

Making sure the drawer will still work


(5) Just screw each plate once at each end. You don't need to screw every single hole on the mending plate, one at end end to attach it to each drawer is plenty!

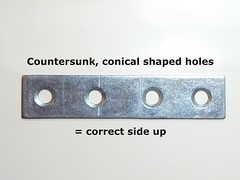
(6) Use the correct side of the mending plate. Once side has a flat edge to the holes, the other is almost cone-shaped. It's the cone-shaped side of the holes that need to be visible - they fit very snugly with the countersunk screws to make a proper fit.

Countersunk holes on correct-side of medning plate

(7)
If you're working on drawers with hardwood sides then you'll need to use the drill to pilot very small, shallow and narrow holes after you've marked the holes that the screws go into. Hardwood is just too tough to screw into without piloting first! Note, that this piece of IKEA furniture is made from particleboard aka chipboard, and for a very short ½" length woodscrew it's quite straightforward to screw in successfully by hand without the need for piloting/drilling beforehand.

(8) [OPTIONAL] Use silicone spray on the metal runners - BEFORE you attach them to the drawer sides. Once the drawers are in place it'll be very hard to access them easily to spray. The spray will help oil-up the drawers so they run more smoothly for you. Have some tissues, or kitchen paper handy to wipe up any excess/spillages. Silicone spray is clear, and colourless so it should not stain or discolour your drawers (it certainly has done so on mine!).
Lubricate metal runners with spray before you start

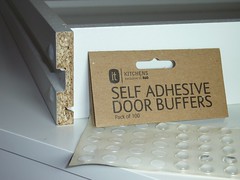
(9) [OPTIONAL] Apply self-adhesive door buffers to the back of the drawers - to ensure that when you shut the drawers you don't get any bumps, or banging noises.

Self-adhesive door buffers

STEPS
[Applicable for the IKEA ALEX Drawer Unit.]
(1)   Make-up and assemble lower drawer as per instructions.
(2)   Assemble upper drawer, and leave out the base/bottom (you can always label it, and store it safely should you ever want to change the drawers back to normal).
(3)   Insert drawers into unit, and bolt into place (see steps 15,16,17 of the IKEA assembly instruction PDF). Don't over tighten the bolts at this stage - you WILL need to loosen them later on.

IKEA ALEX Drawer Unit - assembly steps 15, 16 and 17

At IKEA

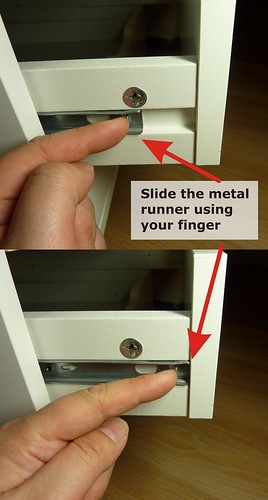
Slide the metal runner to the front

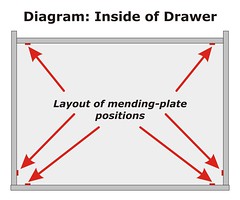
(4)  Pull out the lower drawer only. On the inside of the lower drawer - use your pencil to mark the centre position of the mending plate hole. Do this for all 6 mending plates. You want to position the plates along the drawer-front, near to the front (1 each side: left and right), and the same along the back.

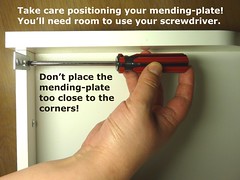
Layout of mending plates inside of the drawer     Don't position mending plates too close to the corners

NOTE: Do not position the plates right into the corners - you simply won't have enough room to hold and use your screwdriver, and you'll just make the work harder for yourself. If you do get the plates to close to the corners it restricts your hand movements, and the screws will more likely than go in at an angle. Wonky screws are not as effective, or as strong as correctly inserted ones LOL!


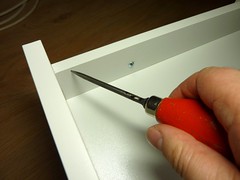
(5)   Use the bradawl to make a small indent into all of your pencil marks on the lower drawer. Hold the draw steady with one hand, and use the other to press the bradawl carefully, and firmly into the sides of the drawer. (If you find it tricky to make the dent use a hammer to lightly, but firmly tap on the end of the bradawl - you may want to ask a friend to help hold the drawer steady whilst you hammer-away!)

Use a pencil to mark the centre of the bottom hole     Use a bradawl to indent and mark the screwholes

The indent is there to help the pointed-tip of the screw find the right starting spot! This stops the screw from sliding around and out of position.

You may find that you need to undo or loosen the retaining bolts that attach the drawer-sides to the metal runners. This will allow you to bring the drawer further forward in order to reach the back-wall of the drawer. Remember to re-insert the bolts after Step 6!

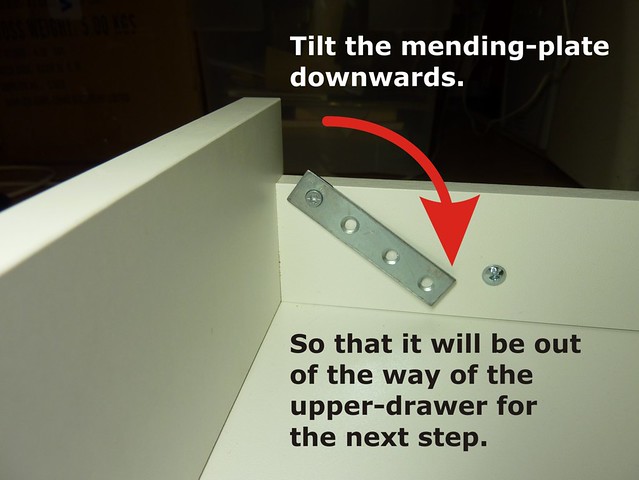
(6)   Screw the bottom hole of the mending plates onto all 6 places on the lower drawer. Don't worry about keeping them upright - just screw in the bottom hole, and then turn the plate down towards the bottom of the drawer (this means you can slide the upper-drawer out easily without hitting the half-attached plates!).

Tilt the mending plate downwards

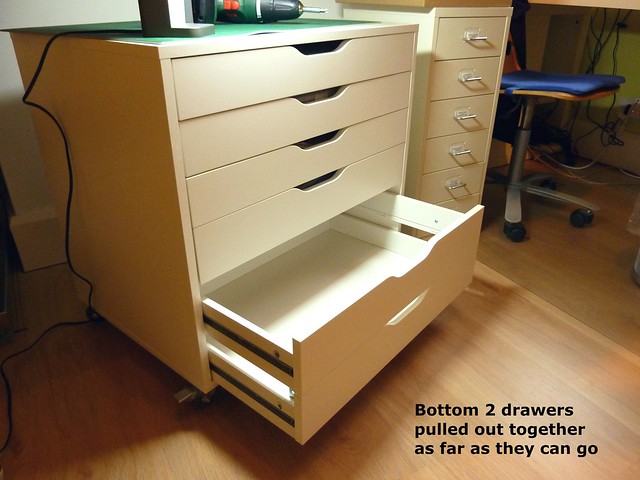
(7) Now, make sure both the upper, and lower drawers are pulled out together. You want them pulled out as far as they will go. The metal runners will stop them falling off of the end, and they'll both stop together at the same point - nice and level.


Both drawers pulled out together as far as they can go

(8) Tilt the mending plates back up into position so that they overlap the insides of the upper drawer. Mark the centre of the top hole on the plates.

(9) Tilt the plates back down, and slide the lower drawer back into the unit. Working on just the upper drawer, bradawl the marks for the screw-holes. (Again, you may want to loosen those retaining bolts on the sides of the drawers connecting to the metal runners, just for the bradawling part - but, remember to put them back when you've finished this step!)

(10) Pull the lower drawer out again so that both drawers are out as far as they can go. Tilt the plates back into position and screw them in firmly.

Your all done!!


OPTIONAL: Use pieces of hardboard cut to size to fill in the gaps along the inside drawer-sides, and back (cut them, so that they cover the full height top-bottom). I don't think this is vital for me personally, as I don't think anything will drop in between the gaps. Similarly, the gap at the front of the unit between the drawers is minimal - so it doesn't worry me.

If you feel otherwise, then you could cut down some hardboard (slice with craft knife and a metal ruler - take care!) and stick it onto the inside with double-sided tape... it'd make it easier to convert back to 2-drawers later on should you ever change your mind rather than gluing/nailing/screwing it in. You may even decide to attach the hardboard first, and then attach your metal plates over the top - however, it'll be harder work to screw through the extra layer!


 WARNING:
 You need to be very CAREFUL when screwing the plates along the inside of the drawer-fronts
 because a) it'll show through anything other than a small horizontal gap between the 2-drawer
 and that'd be visible/ugly, and b) if you get your screws too long, or you screw through too
 deeply then the tip of the screw will break through and ruin the surface (ask me how I know
 this from past experiences :( !)

*It's funny screws are more often than not sold in the UK according to their length in inches, not in metric/mm. And, yet the gauge, or thickness/diameter is given in terms of a "g" (gauge) measurement. The length whether the screw is countersunk style, or say pan head refers only the the length of the screw that becomes fully inserted into the wood - and NOT to the length from end-end of the screw itself. If you're very geeky (like me LOL!) you can read more about screw sizes here, here, and here.


Friday, 27 January 2012

Sewing Spaces... Drawers for Drawing, Wheels for Wheeling! (Part 1)


I'm still slogging away at the sewing room peops!

A few weeks ago we bought an IKEA: ALEX Drawer Unit. The unit is sized at: 67cm wide, 48cm deep and 66cm high including the height of the castors (W: 263/8" / D: 187/8" / H: 26 "). It has 6 drawers - the top 3 are a tiny bit shallower than the bottom 3.

Image Source: IKEA
(ALEX Drawer Unit on Castors, Article Number : 401.962.41, £81.99)

I picked the unit because it fits perfectly with my 150cm x 75cm cutting table. My cutting table is wall mounted to my chimney breast on some clever sprung-loaded hinges (Note to self: I must do a separate post on how I built it soon!). So, the drawer-unit can be wheeled underneath very easily when the table is up 'n' out for use. And, when the table goes down flat it sits in front nicely and takes up very little floor-space in the sewing room.

Having such big flat drawers is ideal for the job I had in mind for this new bit of kit... a place for my pattern drafting supplies!


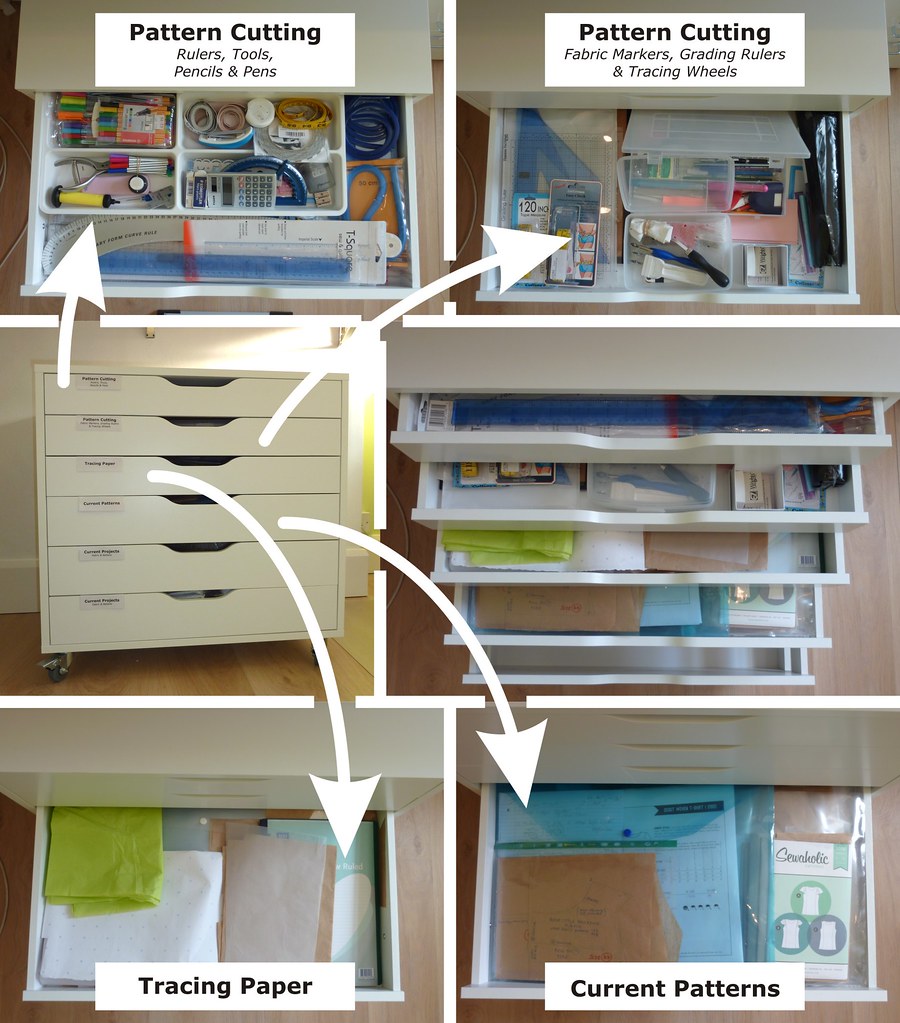
Inside the finished ALEX Drawer Unit
Inside of my finished and filled drawers 
(the bottom drawer - not shown, will
hold my current projects in-progress).

Modifications...
(1)  NEW Grey rubber castors + breaks
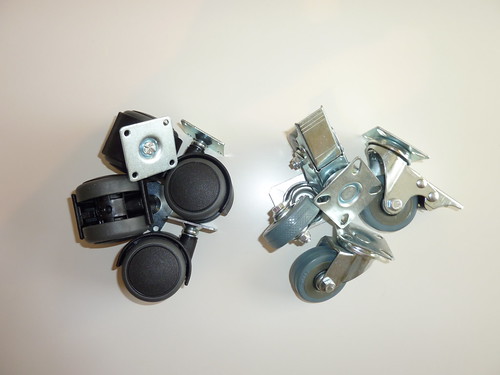
        IKEA provide you with 4 black plastic castors as standard.
      I felt that the hard plastic was pretty likely over time to scratch-up the lovely new
      laminate flooring that Hubby and I had carefully installed over Summer. So, I replaced them
      with these grey rubber castors which I got from eBay for under £5 including postage!

Castors - Plastic vs. Rubber with brakes
Left: Original IKEA castors, Right: New rubber castors with brakes

The softer rubber is a) quieter and makes less noise, plus b) by having break-pedals on the front 2 castors I can lock the unit in place (so no wobbling, or sliding off at the slightest knock). Handily, the pre-drilled holes that IKEA put onto the base of the unit exactly matched my new castors - so no extra drilling was needed (yay!).

(2)  Reduced number of drawers from 6, down to 5
      This sounds an odd one doesn't it? But, bear with me please! I wanted a place to neatly
      store projects in-progress, i.e. cut-out fabric for half-finished garments etc. . And, even
      though the bottom drawers are slightly deeper than the top-3, I needed more space than
      they were able to give as provided. So, seeing as this unit is flat-pack assemble it yourself
      stuff I simply choose to omit the hardboard base/bottom from the 5th-drawer down.


The bottom 2 drawers to join up
Can you see how on the upper (5th) drawer
I've not used the hardboard base?


And, I joined the 5th + 6th drawers together using mending plates, and some woodscrews - very easy and cheap to do. 

Here's what is looks like in situ!

01 - Cutting Table Up 02 - Cutting Table Down
Left: Cutting table up 'n' out ready to use,                            Right: Cutting table down, and away

I added labels to each drawer-front - including the bottom 2-drawers 'cos it would've looked odd to miss the 5th one out LOL! I printed them at home on paper, trimmed then laminated them (with a small clear border all around to stop peeling). I them bent/creased them so the front hangs off of the top edge of the drawer fronts - and a little inside too. They're stuck on with double-sided tape, so they can be easily removed if I change my mind later on :)


 Tomorrow, I'll show you step-by-step
how I did it; in a tutorial (with lots more pics!).

Thursday, 26 January 2012

And It's A Good Thing Too!


My Novum & I Are Back on Speaking Terms... and it's a good thing too! I was browsing on eBay (as you do ;) ) and I spotted the *exact same model as my lovelie. However, this particular one for sale has no base, case, or instruction booklet. But it's a (gulp!) £149.99 + £10.99 postage.

Blimey! That's £161 (approx. $253 USD).

Now, I do love my machine, but I paid only £26.01 ($40.80) for her - and that's including the shipping costs I paid separately for the courier to get her from the North of England down to me in London. So, mine cost 83.8% less, or you could say they're selling theirs at a little more than 6 times the price I paid!

Wow, that just makes me love and treasure her that bit more :)


*If you're feeling very curious it's item #290659059978 here from the eBay Shop SewingForEveryone

Wednesday, 18 January 2012

My Novum & I Are Back on Speaking Terms...

.


Cleaning the Shuttle Race
Page 25 from the Intruction Book for my *'Novum Deluxe IX' vintage sewing machine

After the jinxed day that was last Friday (LOL!). I finally had time to sit down, clean and oil my favourite sewing machine.

If you recall, she kept tangling thread trapped underneath the feed dogs, and around the shuttle during sewing Hubby's new Ooo Rah Wallet. This meant the machine would stop in the middle of a stitch :(! And, the last time I detangled her the retaining ring and shuttle fell out when I accidentally knocked them as I removed the bobbin and case to get a clear view of the tangling.

Retaining Ring and Shuttle

I kept putting the parts back in correctly (or so I thought): shuttle, retaining ring, then bobbin in it's case. But the machine wouldn't move the needle up/down. It would go down and stay down and not budge. I figured I'd screwed-up the timing or something repair-shop worthy (gulp!). So, after an 'ickle panic on that Friday I decided to go to bed and deal with it in the morning - things always look better in the morning right?

I managed to find the manual - which is now scanned to file for safe keeping too ;). In the first picture at the top above you can see what they say about cleaning the shuttle race section.Can you see in their diagram how they don't show you the position of the shuttle driver (the little banana-shaped thingie)? To slot the shuttle against it correctly (together they form a complete full circle-shape), the driver should be vertically positioned - and to the left-hand side. I had been slotting everything back together with it on the bottom (doh!).

So, I turned the hand wheel towards me, got shuttle driver positioned just right and put all the other parts back inside together - and bingo! The needle moves correctly again - PHEW!!

Here's a few photos of the insides – they’re here, so that if nothing else I can remember how to dis- and re-assemble things again for future. No more mis-aligning things for me please! I rested her on some bits of old cardboard box - 'cause she's heavy and the metal would scratch and damage my table top otherwise, plus it's good for catching any oil-spills too!

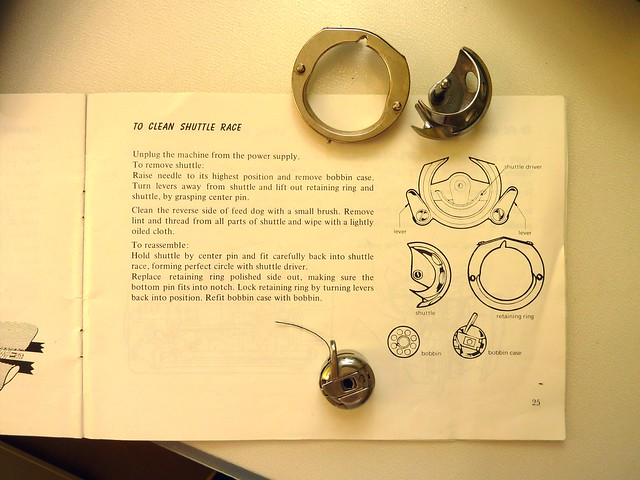
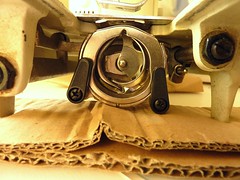
01 - Start and End 02 - Levers out
01 - Start and End position                               02 - Turn levers out
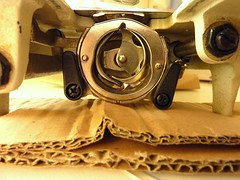
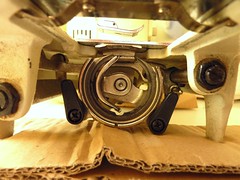
03 - Remove Retaining Ring 04 - Remove Shuttle
03 - Remove Retaining Ring                               04 - Remove Shuttle

Whilst I had Ms. Novum out of her plastic base and her parts exposed (no sniggering at the back please!), I thought the least she deserved was a clean up and oil.

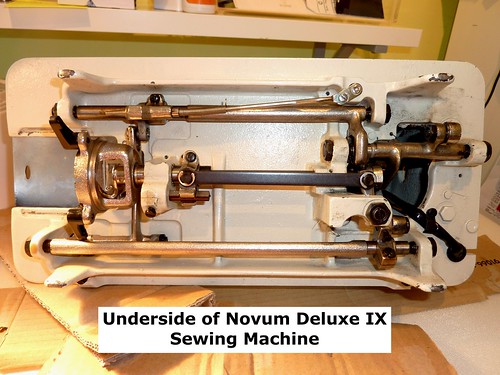
Underside of the sewing machine

I cut up some small pieces of J-Cloth, because it's lint-free and won't leave deposits of loose fibres everywhere. After all, no point in cleaning out old lint and dirt to leave behind new clean-dirt is there? It'd defeat the point.

I also used some neat little tweezers I had - with a narrow/bent tip. I could fold up the small scraps of J-Cloth into a pointy triangle, dabbed some sewing machine oil onto them (not to much!) and really dig into all those nooks and crannies.

Tweezers to clean in the tiny spaces

To be fair, she had very, very little dirt and barely any lint on her. With the tweezers there practically wasn't a spot I couldn't reach; and I got in and around the feed dogs nicely too.

I even found her serial number during the clean-up (I never noticed it before) - it's on the underside.

Serial Number

After her oil up 'n' clean she was running smoother than before - and I managed to finish Hubby's wallet too.


TIP: I have a habit of knocking over things. So, I keep my small bottle of oil in a old clean plastic tub (an old Vanish Detergent tub 1.5kg size - because it's pretty tall). So, the oil lives in something that'll catch any drips/spills - and that tub lives hidden away inside the big drawers in my IKEA Expedit bookshelves. When I use the small bottle I pop it into a pencil pot on the table - that way I'm less likely to knock it over there too. I have a large bottle of oil I use to top up the small one - they live together in the plastic tub. The large bottle works out way cheaper per ml, but the small bottle (same size you get in the shops like John Lewis, etc.) are far easier to hold in your hands and manoeuvre around the machine parts that need the loving care and attention :)


  Image Source: MySupermarket.co.uk

I use an empty Vanish Tub (1.5kg) to keep
my sewing machine oil bottle - so it's safe from spills!


*Sometimes also known as a 'Novum New Mark IX'


Sunday, 15 January 2012

THE GIVEAWAY RESULTS - Congratulations to the 2 Winners!


Thank you so much to everyone who entered my first ever Giveaway!

Of the 38 comments, numbers 9 and 16 were drawn at random - so congratulations to Louise and Amber Elayne on winning your sewing goodies!


Both ladies preferred the January 2012 issue of the BurdaStyle magazine - and as I'm feeling super generous (and rather than *make someone take the December '11 magazine) I'm going to see if they still have another copy of that issue in my local branch of WHSmith's. 

I've emailed you both today to ask you for your postal address - I hope to send your bundles of joy out this Monday. Your cards will be posted seperately by Gwen from GwynHug.com.

Well done ladies - do let me know what you make from the mags, and what fabric you buy using your new 'The Original "How much Fabric?" cards'  won't you? :)


*Perhaps, I'll save the December 2011 magazine for another giveaway on another day eh ;)?

Friday, 13 January 2012

Ooo Dear, Rather Than Ooo Rah!

Poor broken sewing machine + Hubby's unfinished wallet :(


Seems not to be my lucky day, I'm pooped and going to bed in a bit :(!


I've been working the evenings this week making Hubby the much-promised new wallet he wanted (his is literally falling apart and ripped to shreds poor luv!). I'm making him Debbie's fab Ooo Rah Wallet Pattern, available on Etsy :)

But, tonight the sewing gods are against me methinks!

1.) I spent ages re-sizing the pattern Wednesday and Thursday night  (Hubby wants a smaller size). But, I still managed to a) cut 1 too many card-slot pieces than I needed & I hate wastage LOL!, and I got some alignments wrong poo!

2.) I picked the wrong fabric for the lining/ inner pieces. It's a v. tightly woven black fabric. And, frankly after trying 5+ different needle sizes (mixture of for 'Wovens' and 'Universal' needles) I realised the error of my ways, but it was too late to change my mind.

3.) Got sticky sellotape all over the clear vinyl (I thought I was being smart using it to hold things in place... it'll tear of easily, or so I thought) - and it took forever too get it off. I spent a good 30mins cleaning it and picking out minuscule bits of tape from underneath each stitch... NOT a happy bunny!

4.)  Nearly melted the vinyl! I washed the I.D. panel after using 'Sticky Stuff Remove' to get off the sellotape residue, and though I'd layer it between paper and iron it dry. Mistake! The vinyl went all soft and nearly shrank... luckily I rescued it (phew!). I was not going to recut and fiddly around with that piece again, no siree!).

5.) I got 3/8" and 1/8" mixed up (I misread my metal Measuring Guide haha!). So, I stitched the fabric tabs on the ends of the zipper at the wrong distance... but if you don't tell Hubby then I won't ;)!

6.) I sewed the zip to the fabric the wrong way up. I managed to get the interfaced side of piece 2. on the outside by mistake - had to rip it out and start again... unpicking small black stitches from black fabric at night is not my idea of fun. And, the bobbin ran out of thread just as I restitched that piece back in.

7.) I went to use my bobbin winder gadget - and the batteries ran out half way through filling it up. On Wednesday, I went to use it with the power lead - I had to use a US-UK adaptor, but I didn't read the US plug which showed an input voltage of 110V (UK is 220-240V) so I burnt it out - poo! Ordered a new one from eBay, right voltage + UK pins on the plug this time (I hope it works!). 

8.) For some strange reason, today Blogger has "lost" the little reply-buttons I'd sent ages figuring out how to do the html-code for into my blog-template. Plus, the new code I added a few days ago has disappeared too (which added numbers against each comment in a little blue box).

And, to cap it all my lovely Novum is broken... wah!! The bobbin thread keeps winding around the insides of my sewing machine and stopping the machine from moving the needle up/down! I keep untangling it but it keeps doing it (it'd only done it tonight - must be the date??). I took out a part that hold the bobbin case (can't find my manual either tonight - so can't remember the name of it) to get to the tangled thread. Got the thread out, put the part back in - but I must've done it wrong, cause the needle will now move down and then stops in it tracks.


So, I'm fed up *sighs* and hope that I have better luck tomorrow!

Thursday, 12 January 2012

GIVEAWAY... Don't forget to enter, only 2 days to go!

.
.

These lovely goodies are all waiting to go to a new home... could it be yours?
Enter my GIVEAWAY before 12pm this Saturday to find out!


Sunday, 8 January 2012

The Brighton De-Stash Meet-Up!


Image Source: (With modified text) MP900442458 

It's a New Year, and a great time to clear the decks and start as we mean to go on. With this in mind Zoe of 'So, Zo...'  and myself are co-hosting a meeting up at the beginning of February for sewists looking to destash their fabrics, patterns, notions etc. Come and join us to clear your unwanted items - give that book / magazine a new loving home, donate some thread that doesn't match your fabric, and find some lovely new & FREE treasures to start off your 2012 sewing with some fun! 

Image Source: Sewing Supplies, MP900439249 
http://office.microsoft.com/en-gb/images/

If like many (most?!) sewists you find that you spend too much time wading repeatedly through the same piles of fabric and patterns in your stash. Or, that you're always purchasing more fabric even though you've a box / cupboard / room full already (delete as appropriate!). Perhaps, when it comes to your sewing supplies you often find yourself feeling like you've "Too many clothes fabrics, and nothing to wear sew?" then maybe you've fallen out of love with some of your purchases. Let's share some of the sew-jo around and come along to Brighton to swap your old stuff for new-to-you stuff. That 'ol thing you no longer like may turn out to be someone else's treasure :)


                   Place: Brighton Rail Station - outside the WHSmith shop
                   Date: Saturday 4th February 2012
                   Time: Meet-up from 11.30am till 12pm
                   Swap-a-thon: 12pm onwards!


We'll meet up from 11.30am outside of the WHSmiths inside of the station, then aim to walk to the cafe/bar (venue as yet to be announced) around 12pm. There, we'll swap and de-stash, chat, eat lunch and make merry. Afterwards they'll be plenty of time to visit some of the lovely sewing hot-spots 'n' shops that Brighton has to offer... afterall you may just need some new buttons to go with your newly acquired pattern and fabric!


                      Wanna join in the fun?...
                       If you fancy coming along to this meet-up please email Zoe at:   
                       sozoblog[at]gmail[dot]com (please mention Brighton Meet-Up in the email subject).


Maps and mobile phone numbers for contacts on the day itself will be emailed to attendees nearer the time once a list of names has been confirmed.

Zoe and I are looking forward to seeing you there!


P.S. You've still got 6 more days to enter my first ever GIVEAWAY :)


Thursday, 5 January 2012

Father Christmas Was Most Kind...


Don't forget! You've still got 9 more days to enter my first ever GIVEAWAY :)

This is the joke I got in my Christmas Cracker at dinner *this year.

Q: Where should a dressmaker build her house?
A: On the outskirts.

Father Christmas was indeed very kind to me this year. Perhaps he thinks I've been an especially nice little girl? Maybe if I write him some letters like Ally has, then I may fare even better in 2012 ;)?

My haul this year is mainly books:-


The Theory of Garment-Pattern Making - A Textbook for Clothing Designers, Teachers of Clothing Technology, and Senior Students I heard about this one from Kathleen Fasanella's review of it on fashion-incubator.com
Winifred Aldrich's 5th Edition of Metric Pattern Cutting for Women's Wear, this book much posted about on sewing blogs surprised me with how thin it is! It's chock full per page with information (so I'm not disappointed) - but given it's coverage in the sewing blogging world I had expectations of an enormously thick tome somehow.
Grading Ruler, by Coni Crawford. This comes to me all the way from the US (a wee present to myself - my huge thanks to Faye for helping me with this :)!) Finger's crossed that it will help me with my hopes to grade the many vintage patterns I've been buying over the last year from Etsy, I should be able to use it with my pattern grading book I picked up awhile back.
Fantastic Fit for Everybody I saw this on Karen's blog and knew I wanted to add it to my list of fitting books.
And, last but not least the Colette Sewing Handbook and the Peony #1017 Dress Pattern from Colette Patterns.

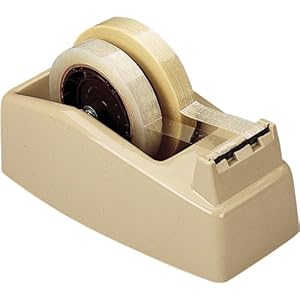
I also received one of these for my cutting table:
Image Source: Amazon.co.uk, Scotch C22 Heavy Duty Tape Dispenser
It takes, x2 75mm diameter-core rolls of tape, up to 25mm (1") wide per roll side by side. I've already filed mine with two-types of the invisible Scotch Magic Tape - normal, and the removable kind.

So, I'm a happy bunny!


*It always strikes me as funny how when in the midst of January we always say "this year" in reference to Christmas - when it was technically speaking last year LOL!

Sunday, 1 January 2012

My First Blog-i-versary, and My First GIVEAWAY!!!


Comments are now closed guys - the winners of the Giveaway will be announced tomorrow at 12pm UK time. My thanks to everyone who entered!


Image Source: MP900399585 + MP900443793  http://office.microsoft.com/en-gb/images/

Wow... HAPPY NEW YEAR EVERYBODY! 2011 you came and went so fast, it seems only yesterday that I pressed a nervous finger on the 'PUBLISH POST' button to my first ever blog offering.

To celebrate the passing of the old year, and the coming of the new one I'd like to give back to the sewing community and to the lovely people who drop-by to read my 'ickle blog and all my inherent musings, and mind-wanderings that that entails ;)!

The wonderful Gwen of gwynhug.com is generously donating 1x set of her fabulous 'The Original "How much Fabric?" cards' to 2 of my readers (P.S. Gwen also blogs at: After The Dress do have a peek!).


If you're a sewist and you've not heard of these nifty little credit-sized cards... then where have you been hiding ;)? They are the perfect handy tool to pop into your handbag (or purse) - great for those moments when you're out and about in the shops and are unexpectedly in the presence of your perfect fabric! We've all been there - you see the fabric of your dreams that is so, so perfect for "that project"... but do you have the pattern envelope or details on you? Nope, so now with these super little cards by your side, you'll always have immediately to hand how much fabric you need for your next garment pattern.

Gwen and her friends created the cards by compiling data from over 3,000 patterns to build the tables, including patterns from Simplicity, McCalls, Butterick, Vogue, Burda, Neue Mode, Kwik Sew, Hot Patterns, & New Look.

The reference cards help you estimate the amount of fabric you need as accurately as possible, by providing tables that summarise actual fabric requirements from real patterns, broken down by outfit size and fabric width.

For instance in the 'Women's Clothes' set: there are tables showing the minimum, average and maximum fabric requirements for Skirts, Pants (Trousers), Tops, Dresses, and Jackets. But not say for example just 1 type of dress - but for different styles,  short, mid-length, maxi etc. - there are even little drawings to help you figure out where your chosen style of 'dress' pattern lies in the tables - e.g. should you be looking at the minimum, average and maximum column in the table?


Gwen will kindly ship directly to each of the 2 lucky readers 1x set of their choice.
(Both UK and International readers are eligible to enter - yay!)

Set 1: Women’s Clothes (6-22/Eur 32-48)
Set 2: Plus Sizes (18-32/Eur 44-58)
Set 3: Men’s Clothes (34-50/Eur 44-60)
Set 4: Babies and Toddlers (Newborn - 6)
Set 5: Children's Clothes (7-16) 

Each set is available in 2 versions:
American - Fabric measured in inches (width) and yards (length) 
Metric - Fabric measured in cms (width) and meters (length)

Can you tell I love these cards? Yup, it's true! I already own a set myself - it's my own set of cards in the photos (LOL, you can tell their mine 'cos they're lovingly worn out a bit on the corners through much use ;) !). And, I'm not the only one who loves them too - read the testimonials here.

And just 'cos I love to share the sewin' love around, I will also myself be personally sending each of the 2 lucky giveaway winners this bundle of goodies each :)

1. A brand new copy of BurdaStyle Magazine.
   (1 person will get December 2011, the other will receive the January 2012 issue).
2. A cute sewing kit tin (I just love the design!) - needles, pins, tape measure, buttons, needle threader, safety pins, thimble, seam ripper, scissors and thread spools -  great for holidays away or to stash away more of your sewing notions perhaps?
3. A set of 4 Fine Line Coloured Pens - only 0.4mm thick lines, so perfect for tracing and marking your BurdaStyle patterns from the magazine in blue, read, purple and green.
4. 2 metres of Pattern Drafting Paper - 36"/91cm wide in dot and cross pattern. The paper will be posted folded to fit inside the packaging.


Here's how to enter the GIVEAWAY... 
[ENTRIES WILL CLOSE ON SATURDAY 14th JANUARY 2011 AT 12.00PM UK TIME. ENTRIES ARE ELIGIBLE FROM BOTH UK AND INTERNATIONAL READERS. WINNERS NAMES WILL BE DRAWN AT RANDOM. THE 2-WINNERS WILL BE ANNOUNCED ON SUNDAY 15th JANUARY 2011!]
 
1. You must be a follower of my blog please.
   (Please see 'Google Friend Connect' or 'Bloglovin' in the side bar on the right of this page).

2. Please leave a comment in this post below - please state:
    a) Which set of cards you'd like (1, 2, 3, 4, or 5)
    b) If you'd like the cards to be in American (inches/yards), or Metric (cms/meters)
    c) Which issue of *BurdaStyle magazine you'd like: Dec 2011, or Jan 2012.

3. Please, please ensure that I am able to contact you if you're a lucky winner! Make sure that your comment is associated to your blog/profile. If you want to leave an email address in your comments feel free to do so - but to reduce the chances of you receiving tonnes of spam to your inbox, please post it in the style: name[at]domain[dot]com.

4. [OPTIONAL] Oh, and do please share you're favourite sewing-moment of 2011, I'd love to know what special creation, fabric or new skill brightened up your year! Perhaps you're looking forward to sewing something special in 2012 - come on spill the beans!


*NB: In the event that both winners ask for the same issue of BurdaStyle then the first name drawn out of the proverbial hat will receive their preferred choice of the magazine.


Good luck! And may 2012 bring you much health and happiness!

And, if you can't wait to get your hands on a set of these cards - visit www.gwynhug.com to buy a set for yourself now !