
I dutifully followed Sunni's instructions for the construction of my toile, and started off by sewing the back darts, followed by attaching the pocket lining pieces to the trousers fronts.
Then, I stitched the pocket pieces to the pocket linings. However, I had a spot of trouble wrapping my head around how this worked (seeing as I'm a beginner and have never sewn a pair of trousers before it's no surprise that some stuff will confound me a little along my sewing journey :)!)... so here's how I helped myself to figure out how the pocket should come together:
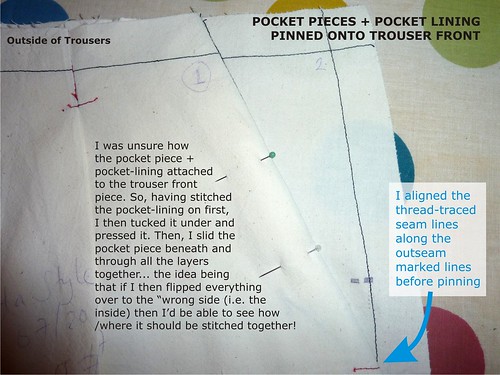
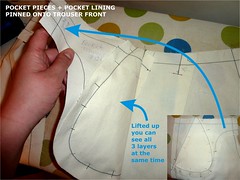
So, having stitched the pocket-lining onto the trouser front first, I then tucked it under and pressed it. Then, I slid the pocket piece beneath and pinned through all the layers together... the idea being that if I then flipped everything over to the “wrong side (i.e. the inside) then I’d be able to see how /where it should be stitched together!
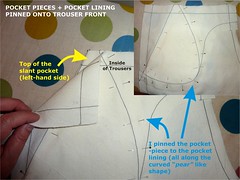
Then, I flipped the whole lot over, and I pinned the pocket -piece to the pocket lining (all along the curved “pear” like shape).
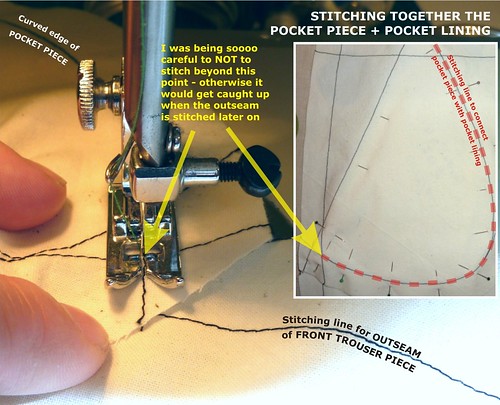
I stitched the parts of the pocket carefully along the deep curve, and I was being soooo careful to NOT to stitch beyond the point in the picture below - otherwise it would get caught up when the outseam is stitched later on!
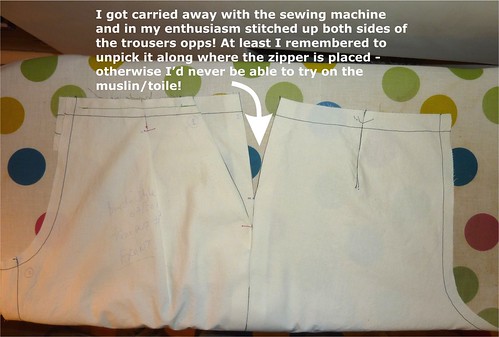
Then, it was time to stitch the outseams (along the outsides of your legs). I got carried away with the sewing machine and in my enthusiasm stitched up both sides of the trousers opps! At least I remembered to unpick it along where the zipper is placed - otherwise I’d never be able to try on the muslin/toile!
Next, up was sewing the crotch seam.
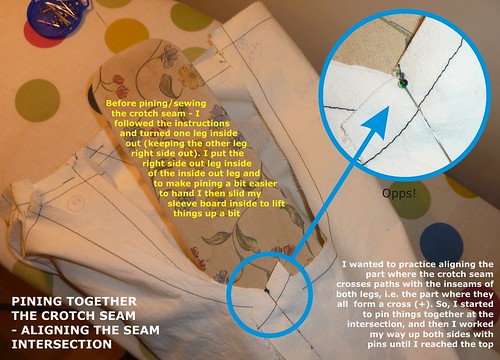
Before pining/sewing the crotch seam - I followed the instructions and turned one leg inside out (keeping the other leg right side out). I put the right side out leg inside of the inside out leg and to make pining a bit easier to hand I then slid my sleeve board inside to lift things up a bit.
I wanted to practice aligning the part where the crotch seam crosses paths with the inseams of both legs, i.e. the part where they all form a cross (+). So, I started to pin things together at the intersection, and then I worked my way up both sides with pins until I reached the top.

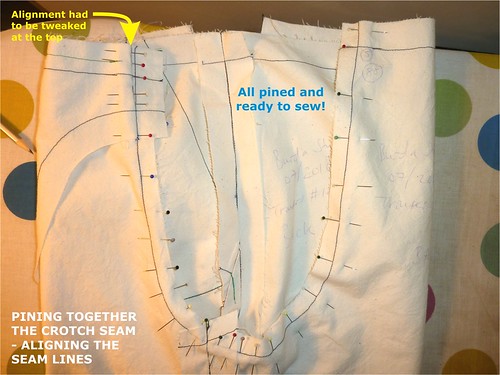
After that, sewing the crotch seam carefully and slowly went far more easily than I anticipated - happy days!
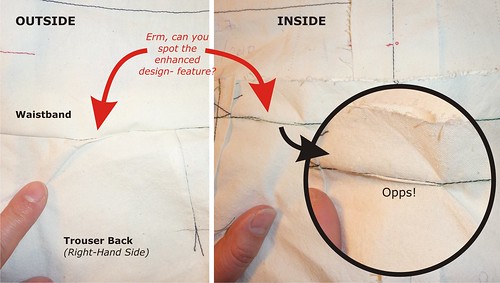
Then, on went the waistband - only a small amount of unpicking needed here - as I accidentally caught some the the trouser front in the seam (oops!)
And, after all that how did they look and fit when I tried them on?...
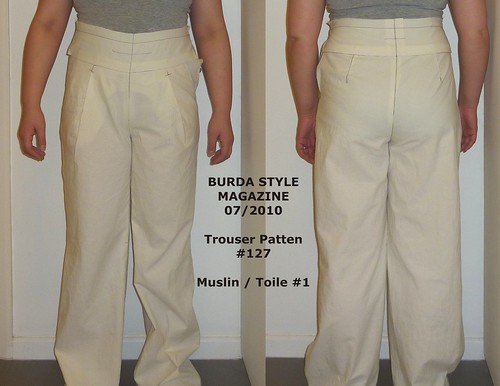
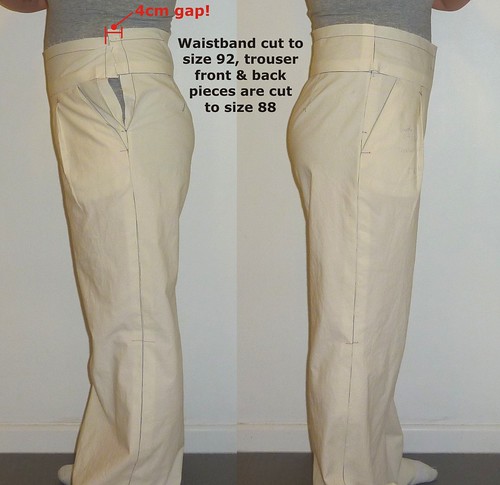
...weeeellll, they're too small LOL! There's a 4cm gap where the waistband should meet up. However, I am happy with how the legs fit in terms of how wide they feel around each leg, and about where the knees hit my own knees, with the crotch depth, but the crotch length might need to be lengthened a wee bit (see the "V" shape at the front of the crotch in the pic above). I think a 2nd muslin is in order from me now - and I will use Sunni's posts (including the ones on: Fullness & Waistlines and Width Alterations for Pants) to make my adjustments.
However, I've decided that I shan't be making further progress on my trousers or on their 2nd muslin until mid/end of March... the reason being is that I am currently taking a beginners evening class on pattern making (it's the 3rd lesson out of 9 tonight - yay !). In the class we shall be making our own custom blocks/slopers for bodice, basic skirt, sleeves, and trousers - and we will be making our personalised patterns into muslins/toiles, and then fit them to our own bodies (altering the pattern/s accordingly). Therefore, my plan is to follow the ideas in this article by Threads Magazine 'The Merits of a Basic Fitting Pattern' to use my own personal sloper to speed up the pattern alteration process :)
I shall post a review of the class mid-March when it finishes :)


.JPEG)


.jpg)


Bummer! They were so close! That class sounds awesome, I'm so jealous, but it's awesome that you get this kind of opportunity. :-)
ReplyDelete